Kitchen Remodel Series, Part 1: A Journey from 2000s Nightmare to Our Dream Space
Pics of the chaos with a sneak peek! From a tiny flower disaster to Key West vibes and everything in between, join us on a wild journey through our #kitchenmakeover. See how we transformed our double-wide kitchen into a cozy, farmhouse coastal haven, one DIY project at a time. #kitchenmakeover
RJ Baker
3/19/20256 min read
Hey there, Semperfidiy.com readers! I’m thrilled to kick off a new blog series today, where we’ll be diving into the wild, wonderful journey of our kitchen remodel. This double-wide kitchen has seen it all—from a late ‘90s country-inspired nightmare to a tropical green experiment, and finally to the cozy, farmhouse coastal haven it is today. Along the way, I got married to my husband (the “Semper Fi” in Semperfidiy—we tied the knot last November!), and we set out to make this space truly ours. We’ve tackled outdated details, painted a variety of things, and incorporated family heirlooms like my great-grandmother’s 1940s kitchen table, all while figuring out how to make this kitchen a place of serenity. Join us on this journey as we share the highs, lows, and everything in between!
The Before: A 2000s Design Nightmare
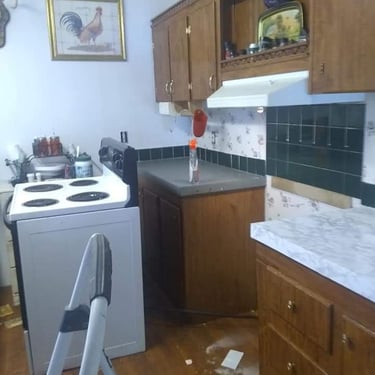
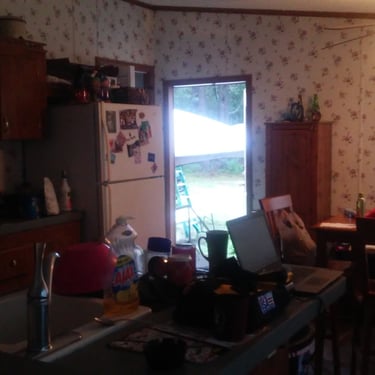
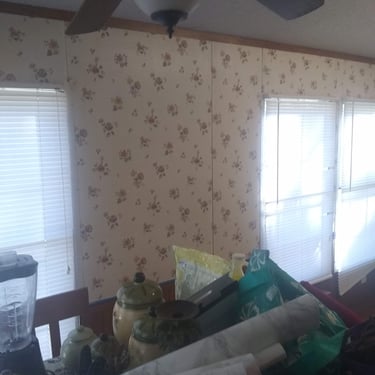
When I bought this double-wide in 2000, the kitchen was straight out of a late ‘90s country catalog—and not in a good way. Think grandma-style wallpaper with tiny floral patterns, medium brown cabinets that made the space feel like a cave, and a wood-print linoleum floor that made it feel cramped and dark. The appliances were the cheapest option, the countertops were sea green laminate, and the whole space had outlived its 90s/00s time of glory. It was a complete 2000s design nightmare, and I knew it needed a major overhaul. Back then, I was single and just trying to make the space functional, but there was no love in this kitchen—just a place to heat up quick meals and move on with my day.

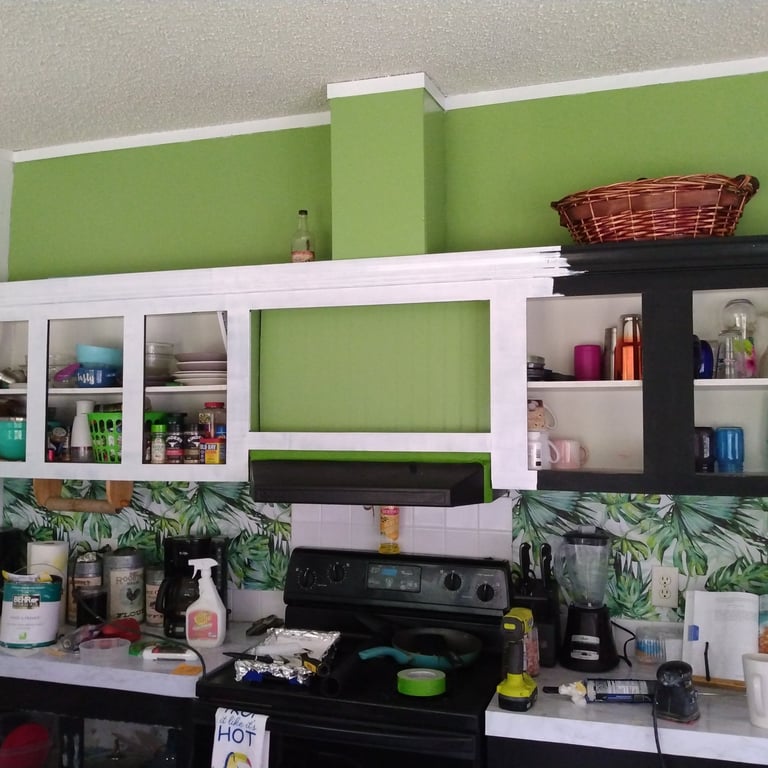
Phase 1: The Gray and Black Experiment (and a Paint Color Mishap)
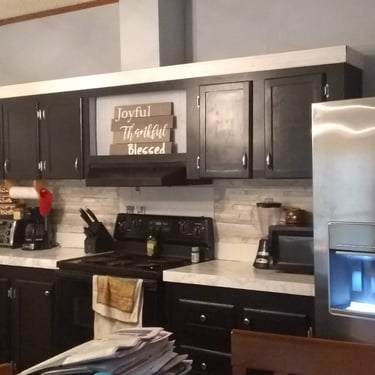
When I first started tinkering with the kitchen, I was a total novice. I knew I wanted to get rid of that country wallpaper, so I removed the “mobile home wall strips” (those thin strips that cover the seams in a trailer—such a pain!) and painted the walls a gray I thought would look sleek and modern. I paired it with black cabinets, thinking I was creating a chic, contemporary vibe. But here’s the thing—I knew nothing about paint color or how lighting affects it. That gray I picked? It had a purple hue that became painfully obvious once the paint dried. Under the kitchen’s fluorescent lighting, the walls looked more like a muted lavender than the cool gray I’d envisioned. I couldn’t afford new appliances at the time, so I got creative and painted the old refrigerator and stove with Rust-Oleum appliance paint in black to match the cabinets. It wasn’t perfect, but it was a start—and honestly, I was proud of myself for taking on such a big project solo.

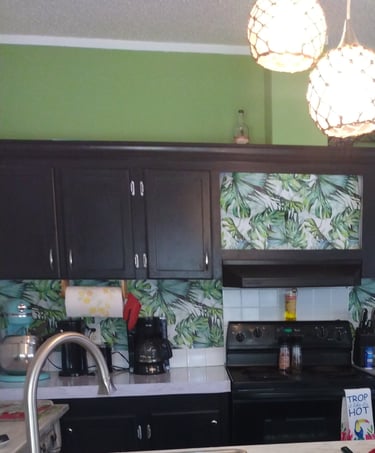
Phase 2: Grenada Green and Tropical Vibes
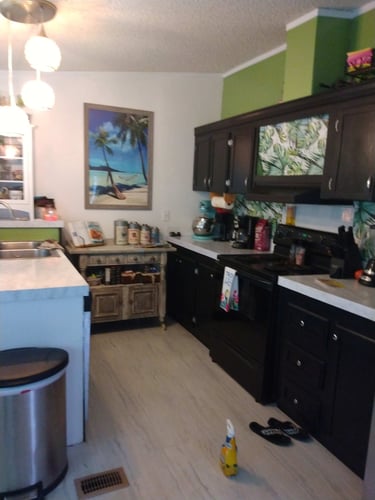
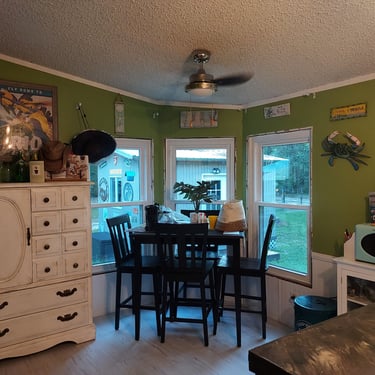
Fast forward a few years, and my future husband came into my life. We got married last November (2024), and as soon-to-be newlyweds, we wanted to make this kitchen a space that reflected us. He loves bold colors, and we both thought a green kitchen would be fun and vibrant. But, once again, we didn’t know much about paint color theory. I came home from work one day to find that he had painted the kitchen Grenada Green—a bright, tropical green that made the room look like a Caribbean getaway. At this point, the cabinets were still black, paired with a black kitchen table, and the combination was… intense. Don’t get me wrong, I loved the energy of the green, but in a small-ish kitchen with a brown floor and dark cabinets, it felt overwhelming. We lived with the Grenada Green kitchen for a little while and brightened the floor to white to tone things down, but we knew it wasn’t the serene, inviting space we wanted for our new life together.
Phase 3: Making It Ours with Thoughtful Updates
After living with the Grenada Green kitchen for a bit, we decided it was time for a more intentional remodel—all on a tight budget. The entire kitchen remodel came in under $2,000, excluding appliances, which we added later by saving our “mad money” (cash we get back from returns or leftover funds from purchases). We wanted a space that felt bright, cozy, and uniquely ours, while also addressing some of the kitchen’s structural challenges—like the lack of a proper dining room in a double-wide.
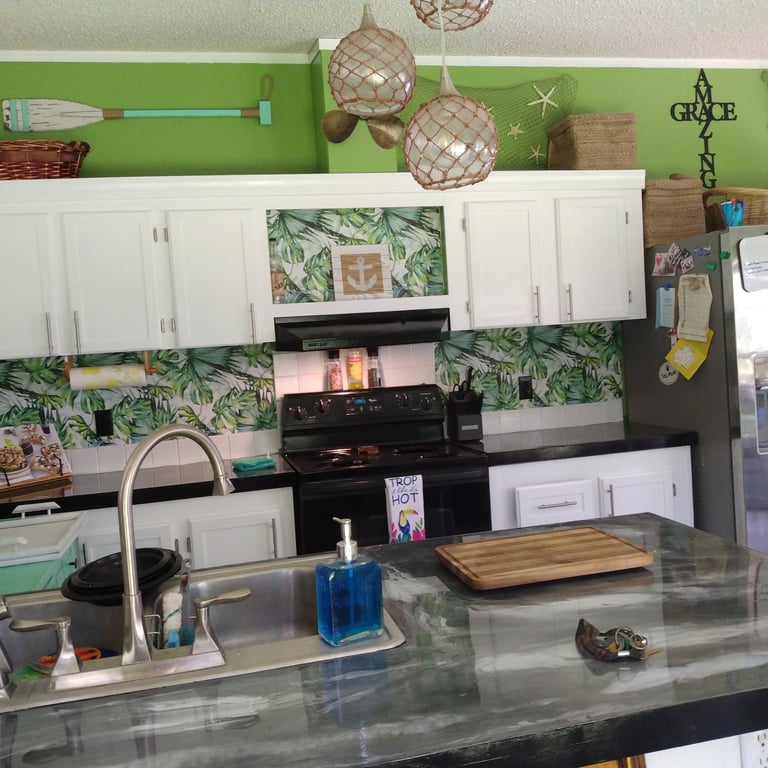
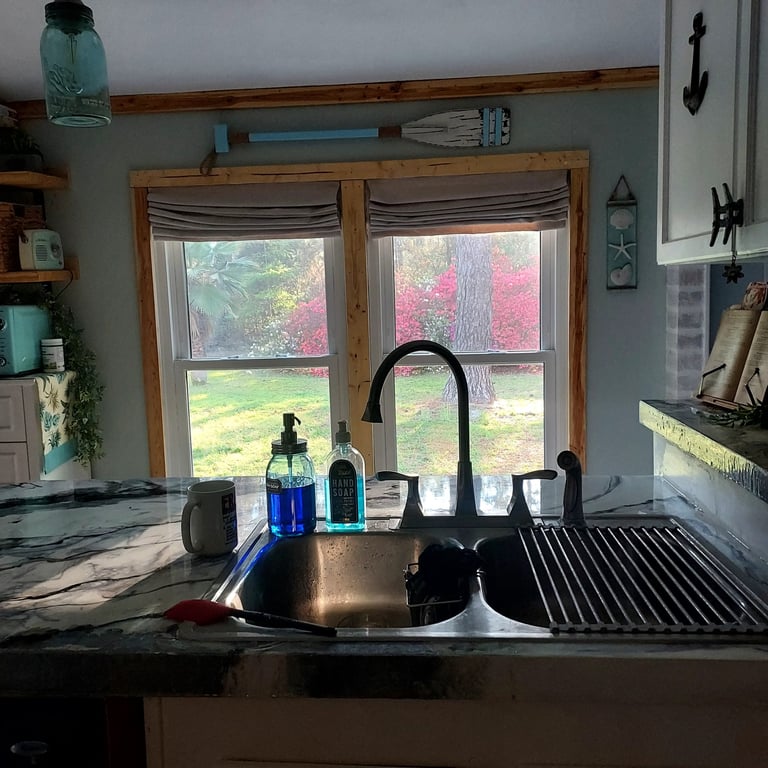
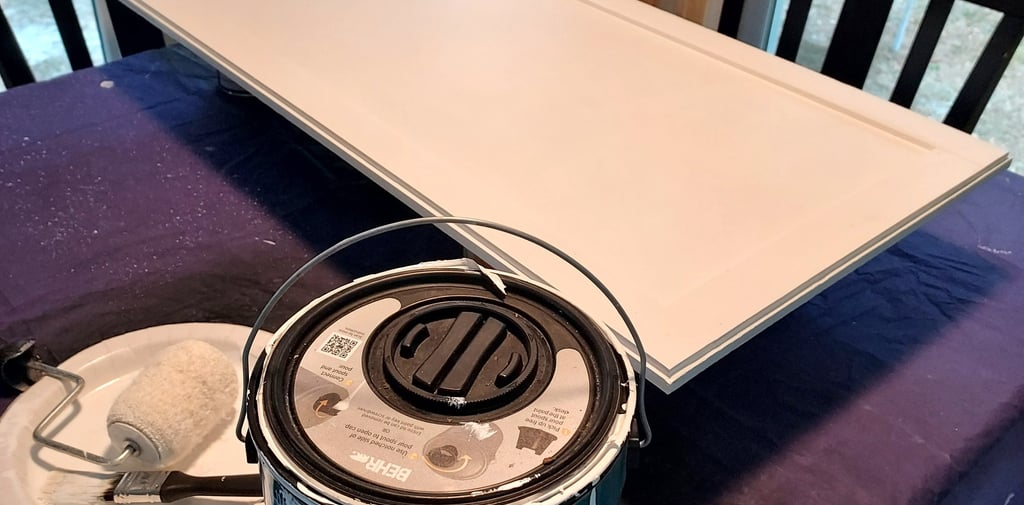
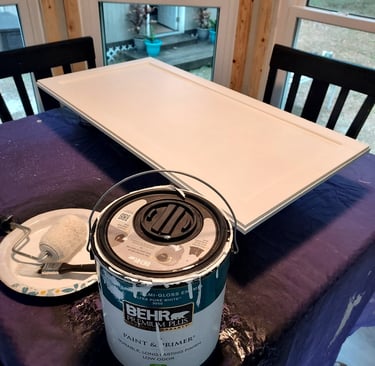
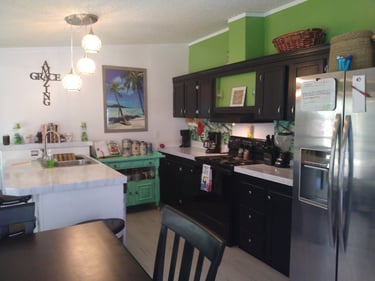
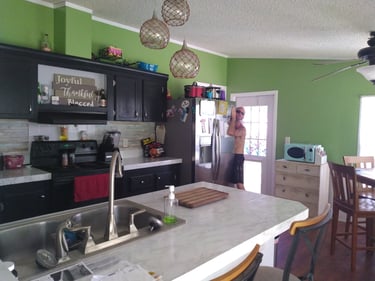
We started by painting the cabinets white, hoping to lighten up the space and create a better foundation for a more calming color scheme. With the cabinets freshly white, we repainted the walls Sea Salt by Sherwin Williams, a soft sea green with a blue hue that instantly brightened the space and gave it a light, airy, natural feeling. The white cabinets paired perfectly with the new wall color, creating a fresh, open vibe that made the small-ish kitchen feel so much bigger. With the walls and cabinets done, we moved on to the countertops. The old sea green laminate was a mess, and replacing it with stone wasn’t in our budget. Instead, we opted for epoxy countertops—a DIY solution that gave us a high-end look for a fraction of the cost. We chose a white base with aggressive black and gray pops, and after sanding, priming, and pouring the epoxy, we had glossy, durable countertops that look like a really expensive, unique stone. This project was one of the pricier parts of the remodel, but it still fit within our $2,000 budget.
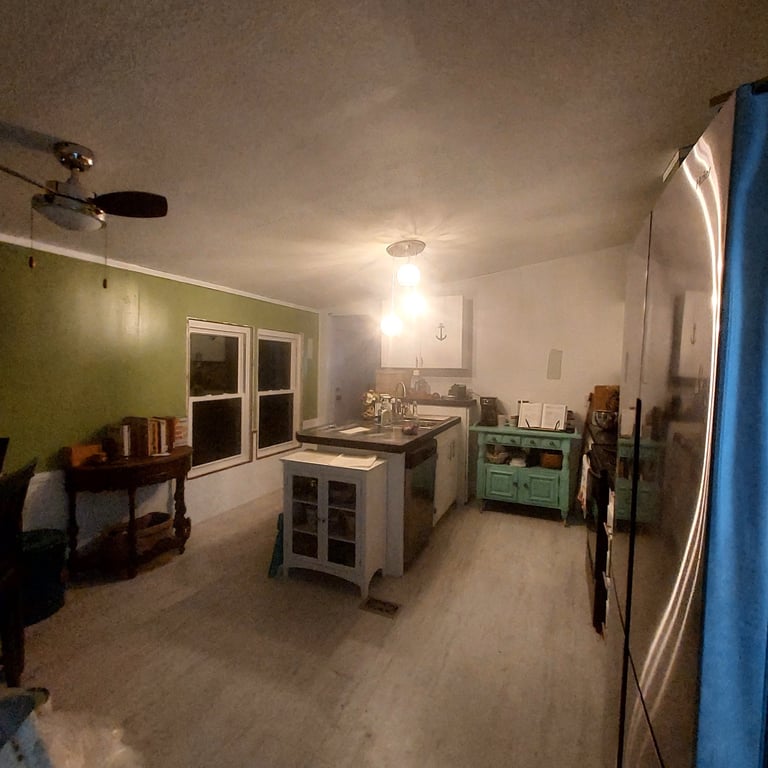
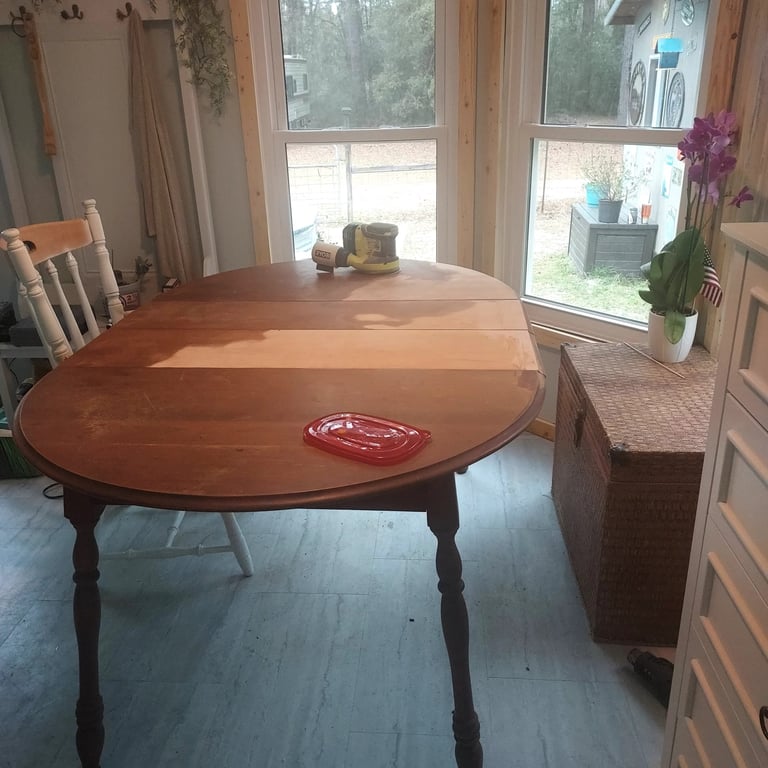
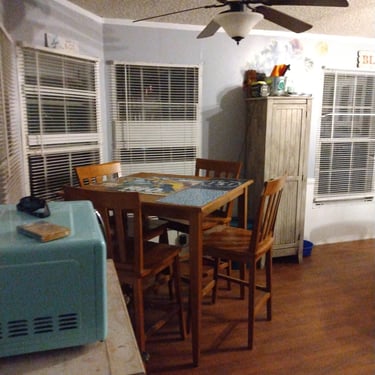
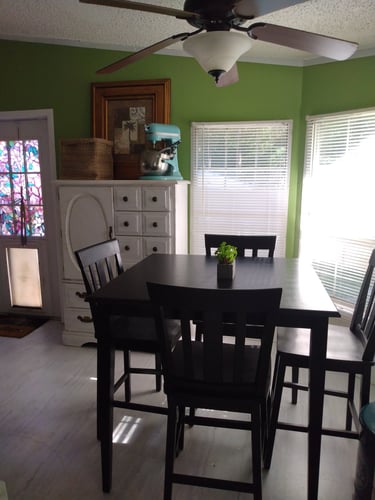
Then, we tackled the layout to create a breakfast nook that could accommodate more people. We repurposed my great-grandmother’s 1940s kitchen table—a beautiful family heirloom with so much history—and tucked it into the existing cozy nook with creative benches and some pillows. This gave us a functional dining area without needing a separate room, and it’s now one of our favorite morning gathering spots. There’s something so special about sipping coffee at a table that’s been in my family for generations—it makes the kitchen feel like a true home.
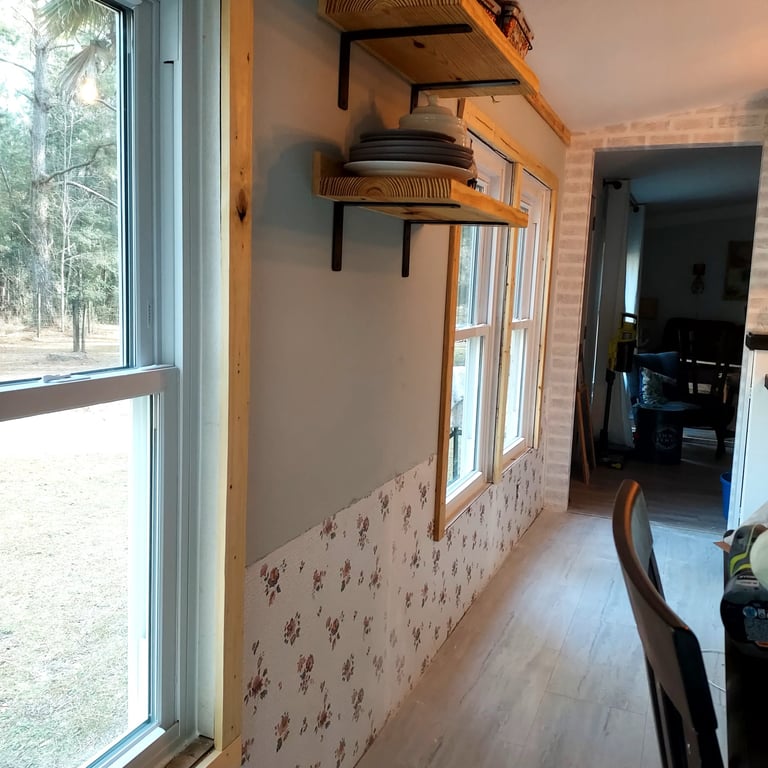
To add warmth and storage, we installed natural wood trim around the windows and baseboards, which brought in an organic, earthy feel that’s perfect for our farmhouse coastal vibe. We also added open shelves made from 2x12s, poly’d and left natural. The open shelves make the kitchen feel more spacious and provide additional decorative storage for our teal blue accent pieces (which tie into the room’s color scheme), a decorative pasta display, our cookbooks, and some of our nicer holiday casserole dishes.
The Showstoppers: Epoxy Countertops, a Blue Mason Jar Chandelier, and More
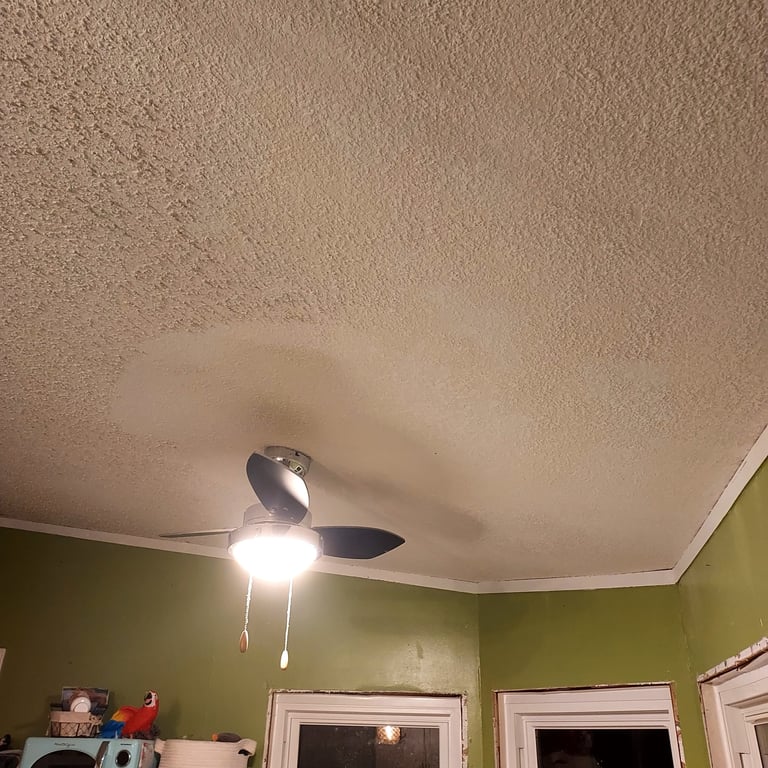
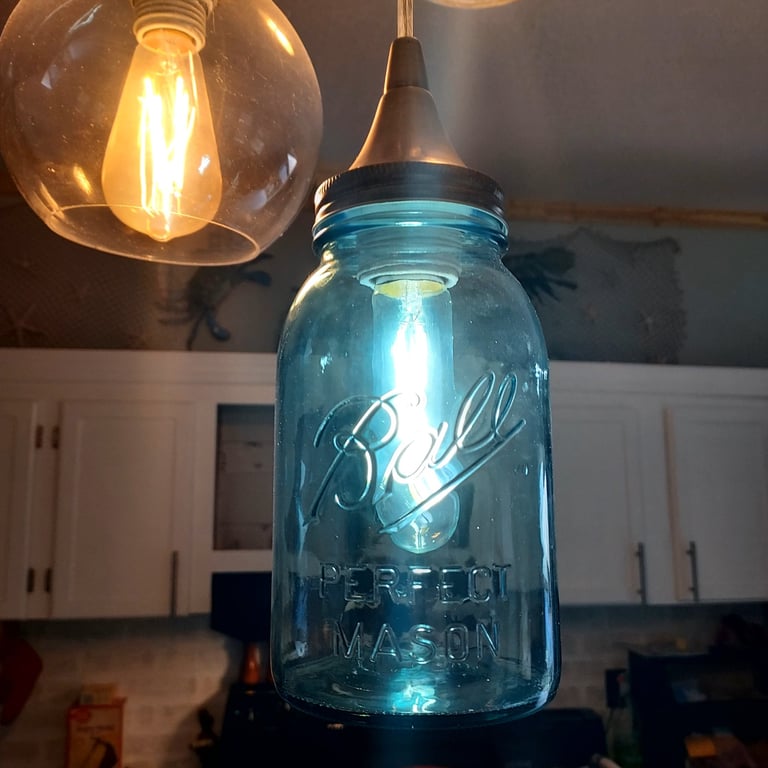
With the main elements in place, we turned our attention to the details that would make this space truly special. The lighting in the kitchen was a pain point. Years ago, I had replaced the old fluorescent light with a hanging centerpiece chandelier from Home Depot. We loved the globes, and they would have gone perfectly with the new natural, airy, organic vibe, but they collected dust due to their design. So, we decided to get creative and used blue mason jars, kept the existing frame, and added Edison bulbs to create a whimsical, handmade light fixture that casts a warm, cozy glow over the kitchen. It’s one of my favorite features and adds a pop of color that feels playful yet timeless, tying into the teal blue accents in the room—like our KitchenAid mixer, microwave, and other decorative accessories.
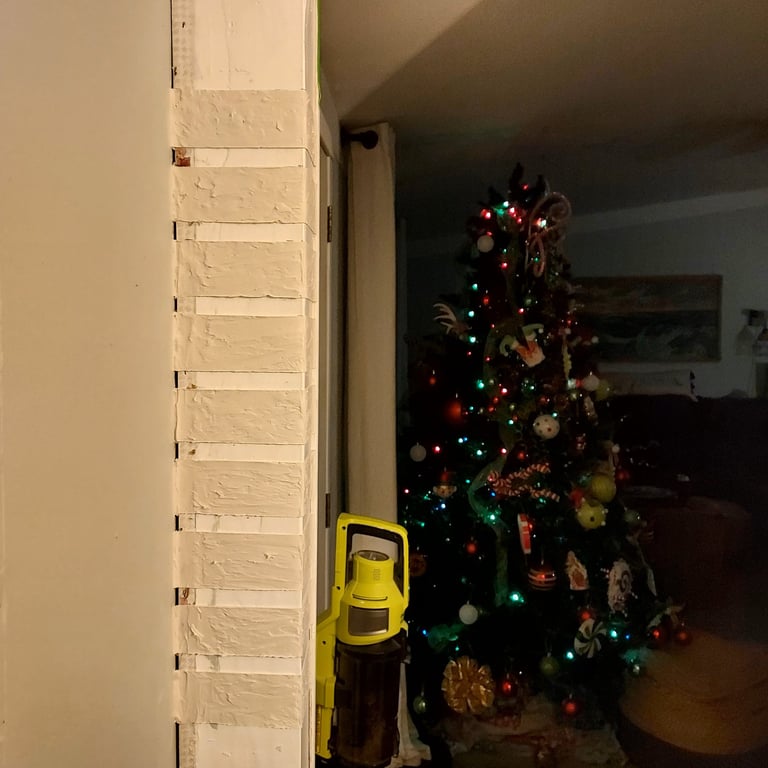
Finally, we added a faux brick wall using joint compound to bring texture and charm to the space. We taped off a brick pattern, spread the joint compound with a trowel, and painted it white with a bit of gray distressing for a weathered look. It’s the perfect accent wall, and it cost us less than $50 to create. The faux brick adds a subtle nod to the farmhouse side of our farmhouse coastal aesthetic, while the white keeps it feeling fresh and light.
The After: A Kitchen That Feels Like Home
Stepping back to admire the finished kitchen, I can hardly believe it’s the same space that once had floral wallpaper and Grenada Green walls. The Sea Salt walls, white cabinets, and natural wood trim create a bright, natural base, while the epoxy countertops, blue mason jar chandelier, and faux brick wall add personality and warmth. The breakfast nook with my great-grandmother’s table is the heart of the kitchen—a place where we can gather, drink coffee, and dream together. This kitchen isn’t just a place to cook; it’s a reflection of our journey as a couple, from our early days of bold experiments to the thoughtful, serene space we’ve created together.
Tips for Remodeling a Double-Wide Kitchen on a Budget
Working in a double-wide comes with its own set of challenges, so here are a few tips we learned along the way:
Maximize Space: Use open shelves and multifunctional areas like a breakfast nook to make the most of limited square footage.
Brighten Up: Lighter colors on walls and cabinets can make a small space feel bigger. A color like Sea Salt by Sherwin Williams is a great choice for a soft, airy vibe.
Save with DIY: Projects like epoxy countertops and faux brick walls can save you thousands while still giving you a high-end look. Our whole remodel was under $2,000, minus appliances!
What’s Next in the Series?
This is just the beginning of our kitchen remodel series! In the coming weeks, we’ll dive deeper into each project, from the epoxy countertops to the faux brick wall, with step-by-step tutorials and budget breakdowns. We’ll also share more about the challenges of working with outdated structures and how we turned this kitchen into a place of serenity.