Kitchen Remodel Series, Part 2: From Tropical Chaos to Serene Beginnings
If you caught Part 1, you know our double-wide kitchen has been through quite the journey—from a 2000s floral nightmare to a bold Grenada Green experiment that left us both stunned
R.J. Baker
3/23/20256 min read
Welcome back to our Kitchen Remodel Series, Semperfidiy.com readers! If you caught Part 1, you know our double-wide kitchen has been through quite the journey—from a 2000s floral nightmare to a bold Grenada Green experiment that left us both stunned. Picture this: I come home from work, expecting a cozy evening, only to walk into a kitchen that looks like a Key West resort exploded in our trailer. Grenada Green walls, black cabinets, and a brown floor—it was tropical chaos! We thought we wanted bold, but this was too bold. That moment was the wake-up call we needed to start fresh and create the serene, farmhouse coastal kitchen of our dreams. In Part 2, we’re diving into the first steps of our final reno: painting the cabinets white, repainting the walls a calming Sea Salt by Sherwin Williams, installing new peel-and-stick flooring, and tackling our game-changing epoxy countertops. Let’s get started!
The Grenada Green Wake-Up Call
Let’s set the scene a bit more. My husband (the “Semper Fi” in Semperfidiy) and I were still in the early days of our relationship when the Grenada Green phase happened. But let’s back up a bit. Before Grenada Green, we had gone through a gray walls and black cabinets phase—my first attempt to modernize the kitchen after the 2000s floral nightmare. I painted the walls a gray that turned out to have a purple hue (thanks to my inexperience with paint and lighting), painted the cabinets black, and even painted the appliances black with Rust-Oleum appliance paint since I couldn’t afford new ones. I also covered the countertops with white peel-and-stick contact paper, thinking it would be a cheap fix—more on that disaster later. The backsplash at the time was an old green 4" tile, which I painted white because I was too afraid to rip it off the wall, worried I’d damage the drywall underneath.
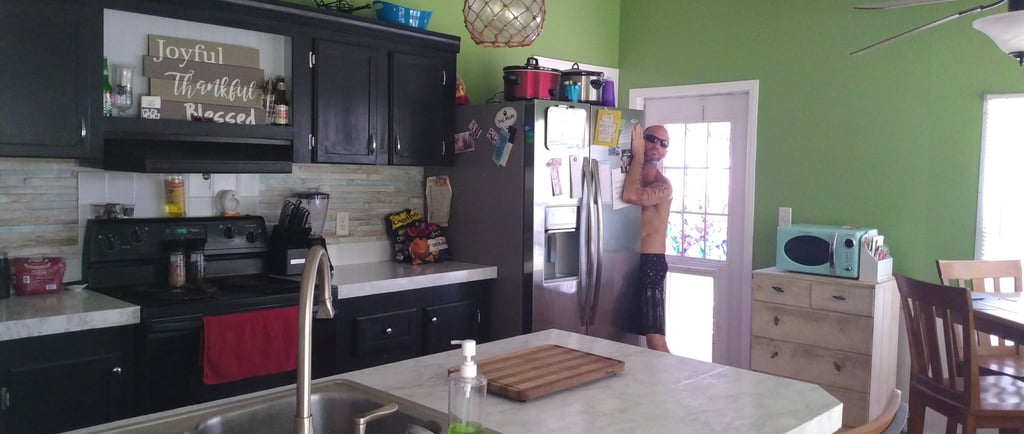
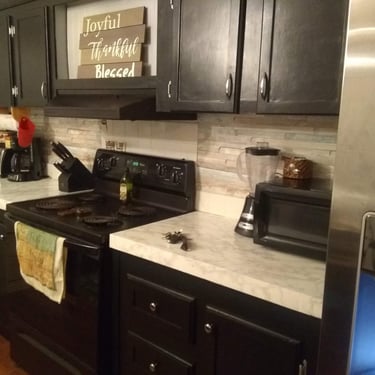
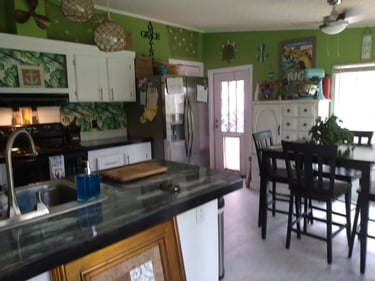
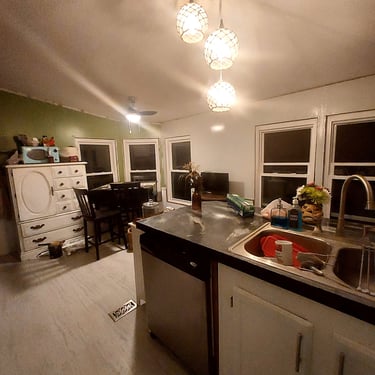
Fast forward to the Grenada Green phase. We decided to go bold and painted the walls a bright, tropical green, hoping it would bring some life to the space. The cabinets were still black, the floor was the original 20-year-old wood-print linoleum (brown), and the wainscot along the lower walls was also brown (so much brown!). With five windows letting in an abundance of natural light, the kitchen was very bright—almost alarmingly so. The Grenada Green walls practically glowed, reflecting off the black cabinets and brown floor, making the space feel like a Caribbean nightclub on steroids. I’ll never forget the look on my face when I walked in—part shock, part amusement, and part “What have we done?!”
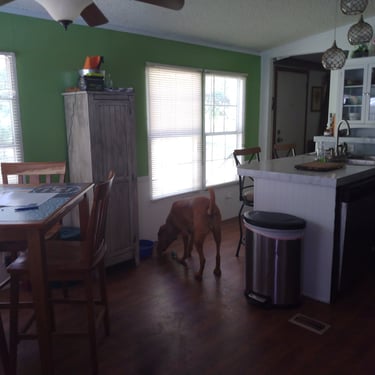
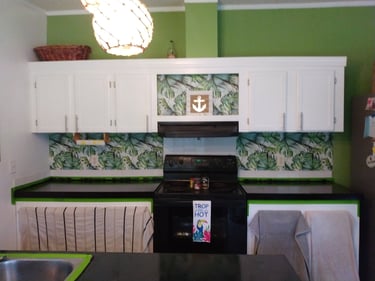
The Grenada Green chaos begins - black cabinets, brown floor, and a tropical glow that was way too much!
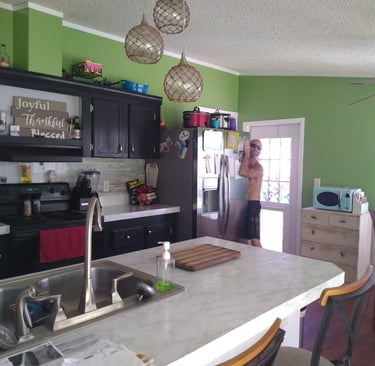
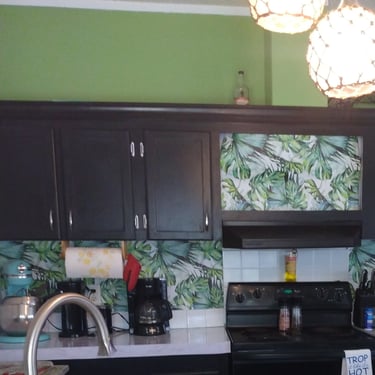
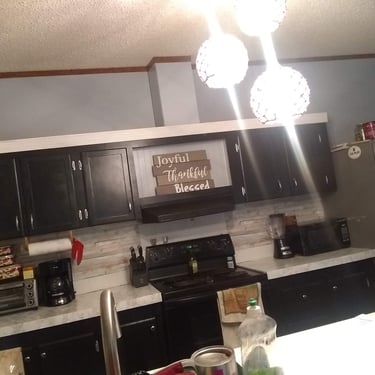
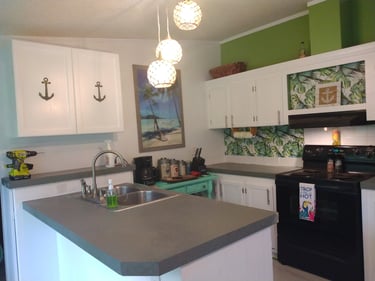
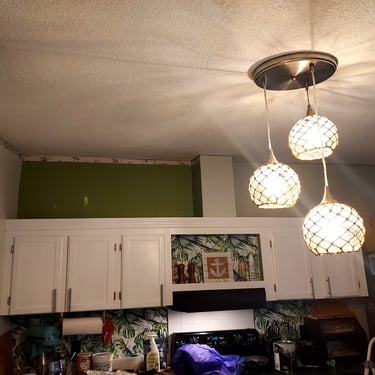
Hoping to brighten things up and balance the green, we installed white peel-and-stick flooring from Walmart right over the 20-year-old linoleum. It was a surprisingly hardy and inexpensive option, and it did help lighten the space, but the Grenada Green was still overwhelming. In a moment of full-on tropical commitment, I decided to lean into the Key West vibe by adding a peel-and-stick backsplash with a loud tropical palm leaf print over the white-painted green tile. I thought, “This will make it feel like a beach getaway!” Oh, how wrong I was. The palm leaf print turned the kitchen into a full-on jungle explosion—I can’t help but laugh at myself now. Between the glowing green walls, the loud backsplash, and the black cabinets, it was chaos.
A Funny Flashback: Contact Paper Countertops
Before we get further, let’s take a quick detour to another DIY misadventure that still makes me laugh. During the gray walls and black cabinets phase (Phase 1 of this kitchen’s journey), I was all about cutting costs—sometimes to a fault. In my infinite wisdom (insert heavy sarcasm here), I decided to cover the old sea green laminate countertops with contact paper. Yes, sticky paper! I thought, “It’s cheap, it’s easy, and it’ll look great!” Well, it did look decent… for about a month. Over the next three or four years, that contact paper became my nemesis. It started peeling at the edges, and every time I set a hot pan down, I’d panic, worried it would melt right into the countertop. Spoiler: it did, more than once. Cleaning it was a nightmare, and don’t even get me started on the time I spilled red wine—it looked like a crime scene! With all that natural light streaming through the five windows, every flaw in the contact paper was on full display, making the kitchen look even more chaotic. Looking back, I can laugh about it, but at the time, I was just trying to make the space my own on a shoestring budget. Lesson learned: sometimes, the cheapest option isn’t the best option!
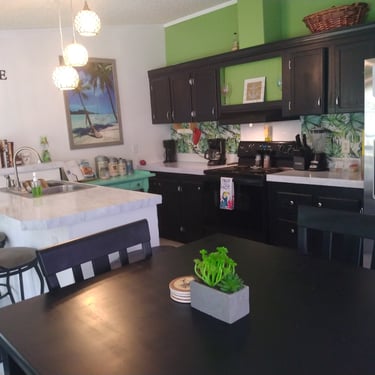
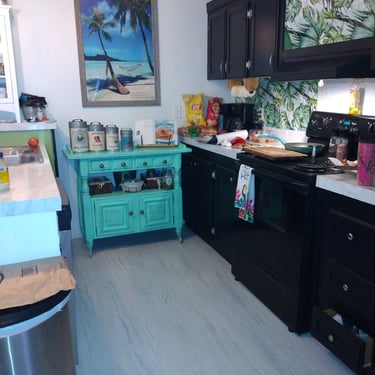
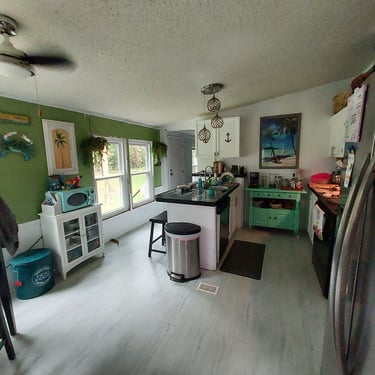
The Grenada Green chaos in full swing—black cabinets, a bright kitchen cart, and a tropical palm leaf backsplash that took the Key West vibe too far!
Transitioning to White: A Desperate Attempt to Tame the Chaos
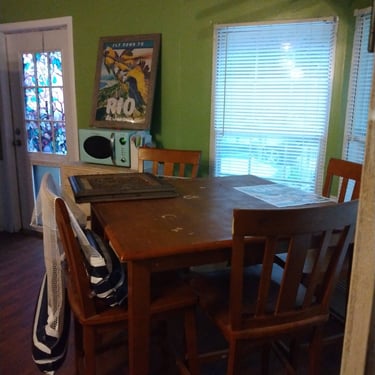
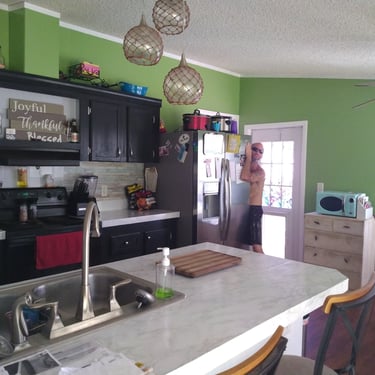
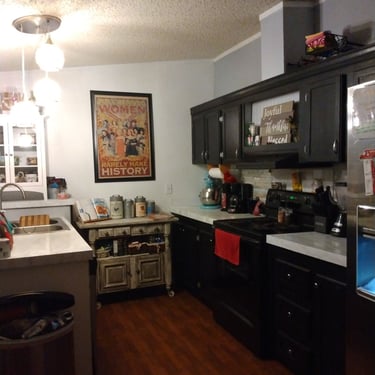
We tried to salvage the space by painting the cabinets and wainscot white, thinking the brightness would tone down the tropical overload. The black cabinets had been a staple through the gray walls phase and the early Grenada Green phase, but they were making the kitchen feel heavy and dark against the glowing green walls. Painting them white was a game-changer—it instantly lightened the space and gave us a glimmer of hope that we could make this kitchen work. We also added a second-hand reclaimed armoire that I painted white, hoping it would tie the room together and add some much-needed storage. In a burst of “Here we come, Key West!” energy, we painted an antique kitchen cart—a beautiful piece we’d acquired with a lake house—a bright, vibrant color to lean into the theme.
The gray walls and black cabinets phase, complete with contact paper countertops that were a melting disaster!

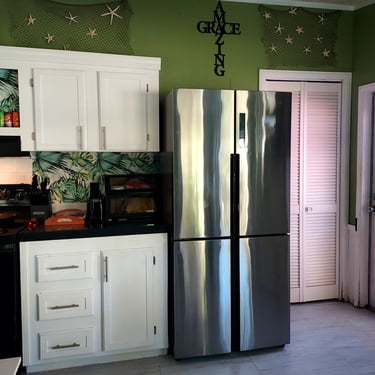
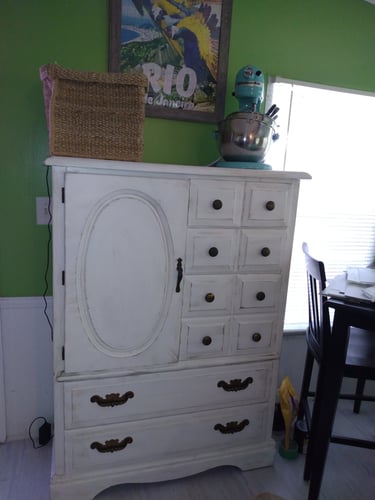

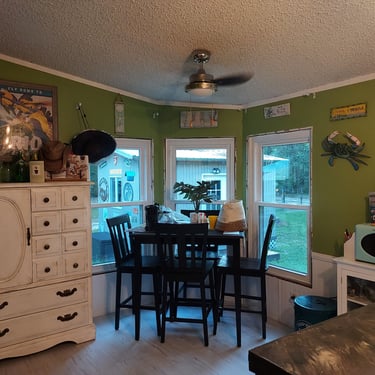
Transitioning to white cabinets and adding a white-painted armoire—a desperate attempt to tame the Grenada Green chaos!
But even with the white cabinets, white armoire, and white floor, the Grenada Green walls and tropical backsplash were still too much. The bright kitchen cart only added to the hodgepodge of colors, and with the five windows amplifying every hue, the kitchen felt like a neon jungle. After a long day of work, coming home to that chaotic, overly bright space wasn’t the inviting refuge we craved. It was clear this wasn’t the vibe we wanted for our new life together—we needed a space that felt like a sanctuary, not a rave.
The Turning Point: Starting to Paint Sea Salt
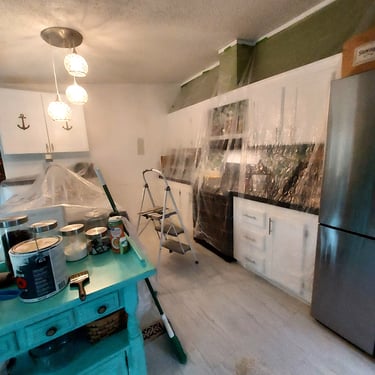
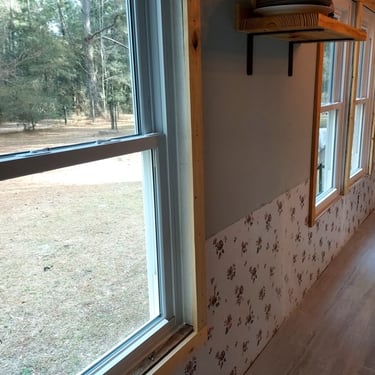
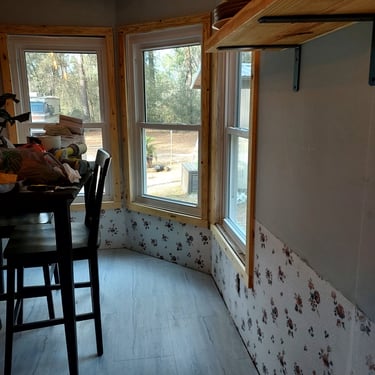
After living with the Grenada Green chaos for longer than we’d like to admit, we knew it was time for a complete overhaul. The first step in turning things around was repainting the walls. We chose Sea Salt by Sherwin Williams, a soft sea green with a blue hue that’s the perfect balance of calming and fresh. It’s a color that feels coastal without being too “beachy,” which was exactly what we wanted for our farmhouse coastal aesthetic. We also decided to rip off the old wainscot that had been in the kitchen since the beginning. Originally brown like the floor (so much brown!), I had painted it white during the Grenada Green phase when we painted the cabinets white, hoping it would help lighten the space. But by this point, it was looking dated and a bit beat up, and we wanted a cleaner, more modern look. As we started pulling it off, we got a blast from the past—the original 2000s floral wallpaper was still underneath! It was like peeling back a time capsule to the kitchen’s early days, and we couldn’t help but laugh at how far we’d come.
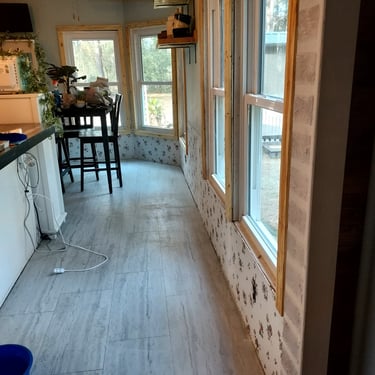
For the paint, we went with Sherwin Williams Cashmere in a flat finish, and let me tell you, this paint is a game-changer. It’s a thick paint with a built-in primer, so we didn’t need to prime over the Grenada Green separately—thank goodness, because that green was a beast to cover! The Cashmere went on like butta (butter), smooth and creamy, making the whole process surprisingly easy. We were worried about covering such a bold color, especially with all the natural light making every imperfection visible, but it only took two coats to get full coverage. The flat finish helped soften the look, reducing glare from the five windows and giving the walls a velvety, calming effect. As we rolled on the first coat of Sea Salt, it was like the kitchen took a deep breath. The soft, airy color started to tame the intensity of the natural light, and we could finally see the serene space we’d been dreaming of taking shape.
Ripping off the old wainscot revealed the 2000s floral wallpaper underneath—a blast from the past!
What’s Next in the Series?
This is just the beginning of our final reno! In Part 3, we’ll dive into the rest of the transformation, including creating a faux brick wall and backsplash, tackling epoxy countertops, installing floating shelves, adding wood trim, and building a new sink base surround—all while keeping the white peel-and-stick flooring we installed during the Grenada Green phase, because we still love it today. Have you ever had a DIY fail that turned into a funny story? I’d love to hear about it - tag us on social media with your own projects using #Semperfidiy!