Kitchen Remodel Series, Part 3: A Serene Transformation with Natural Touches and Thoughtful Details
In Part 3 of our Kitchen Remodel Series on Semperfidiy.com, we complete the transformation with natural trim, a faux brick accent wall, epoxy countertops, unique furniture, and vibrant teal accents, turning our double-wide kitchen into a serene farmhouse coastal haven!
KITCHEN
3/30/20256 min read
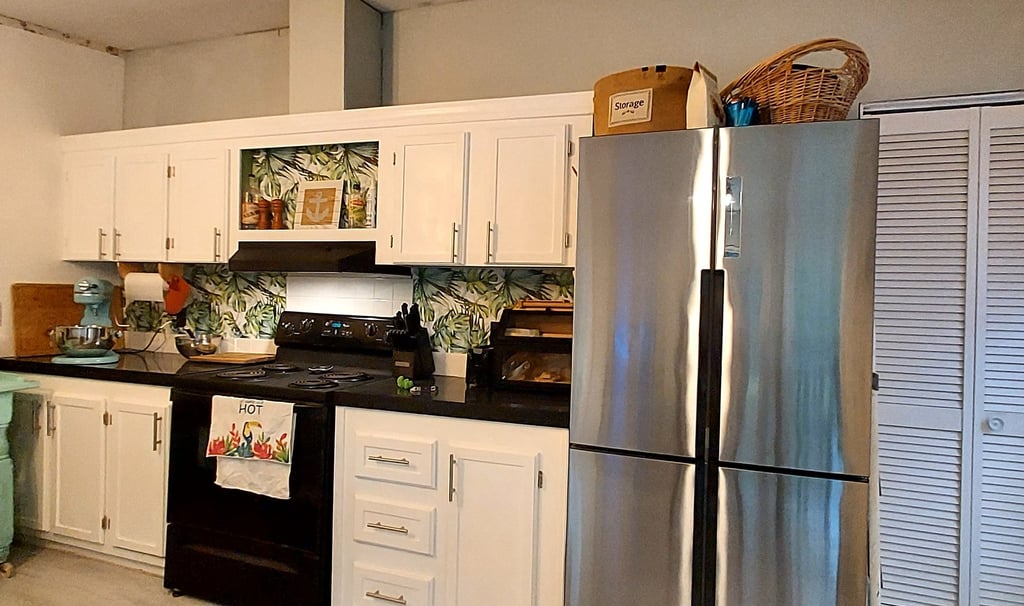
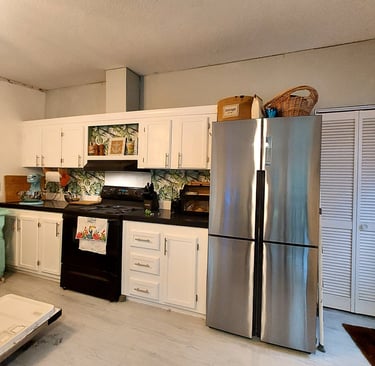
Welcome back to Semperfidiy.com for Part 3 of our Kitchen Remodel Series! If you’ve been following along, you know our double-wide kitchen has been through quite the journey—from a 2000s floral nightmare in Part 1, to the tropical chaos of Grenada Green in Part 2, where we transitioned from black to white cabinets and started painting the walls Sea Salt by Sherwin Williams. That turning point set the stage for our final reno, and today, I’m giving you an overview of the tasks we tackled to transform this space into the serene, #farmhouse #coastal kitchen of our dreams. From natural trim to a faux brick accent wall, #epoxy countertops, unique furniture choices, and pops of color with new appliances, we’ve poured our hearts into this remodel. There’s so much to cover that we’ll break down some steps in future posts, but for now, let’s dive into the highlights—and the photos—that brought this kitchen to life!
A Complete Transformation: Painting the Cabinets and Walls
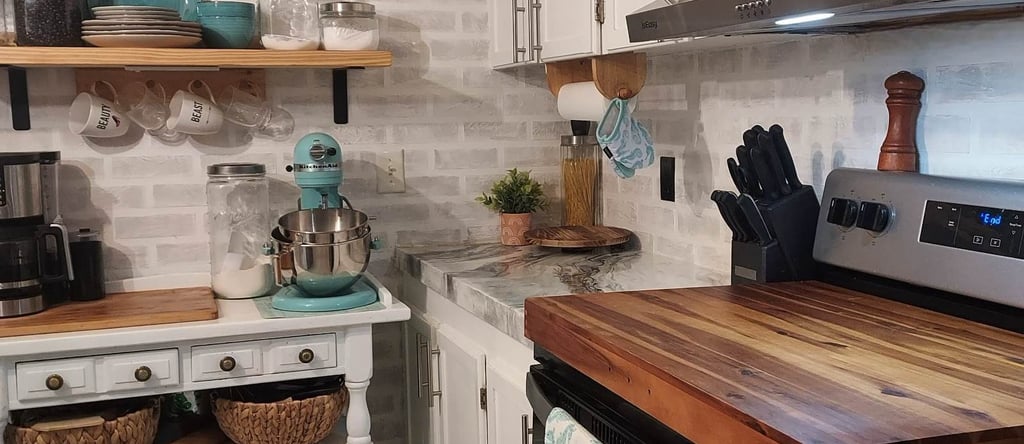
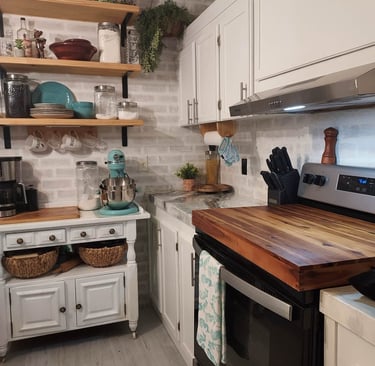
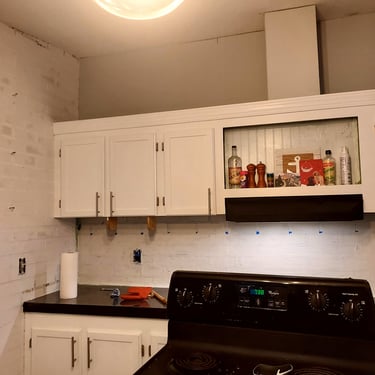
After the Grenada Green chaos, painting the cabinets white and then the walls Sea Salt by Sherwin Williams worked wonders. It was a complete transformation! The whole room opened up, and while we secretly mourned the loss of the Grenada Green (it was bold, I’ll give it that!), what we now had was a neutral palette with the beginnings of a serene kitchen. The Sea Salt, with its soft sea green and blue hues, paired beautifully with the white cabinets, creating a calm, airy foundation. Using #SherwinWilliams Cashmere in a flat finish, the paint went on like butta (butter), and the flat finish helped reduce glare from our five windows, making the space feel even larger. This neutral base was exactly what we needed to start layering in thoughtful details.
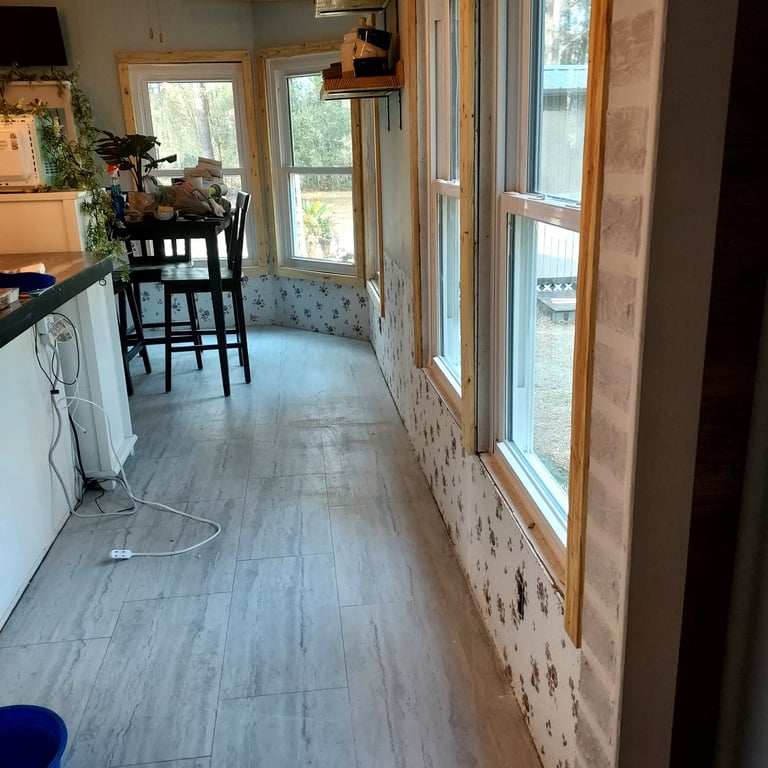
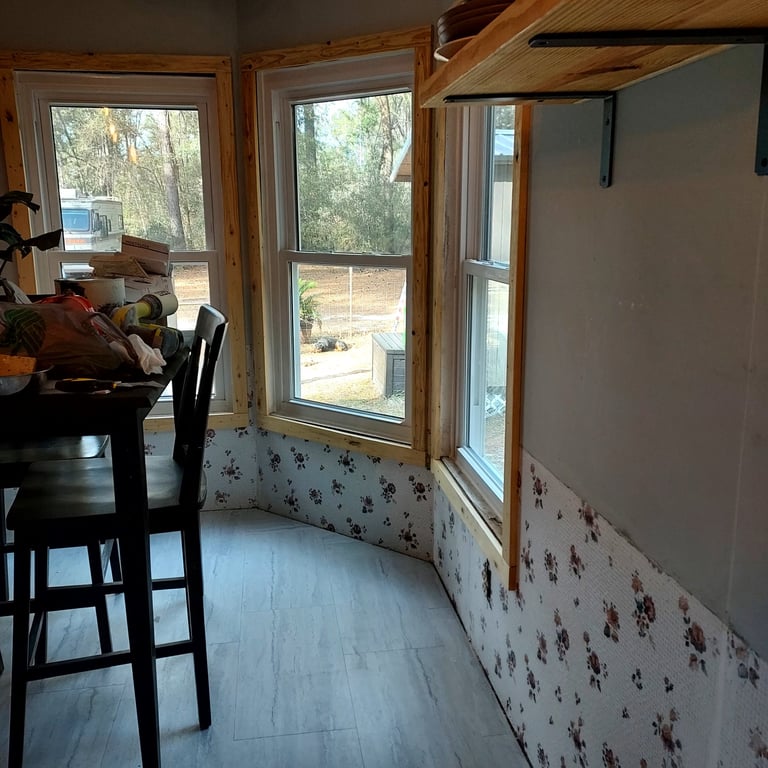
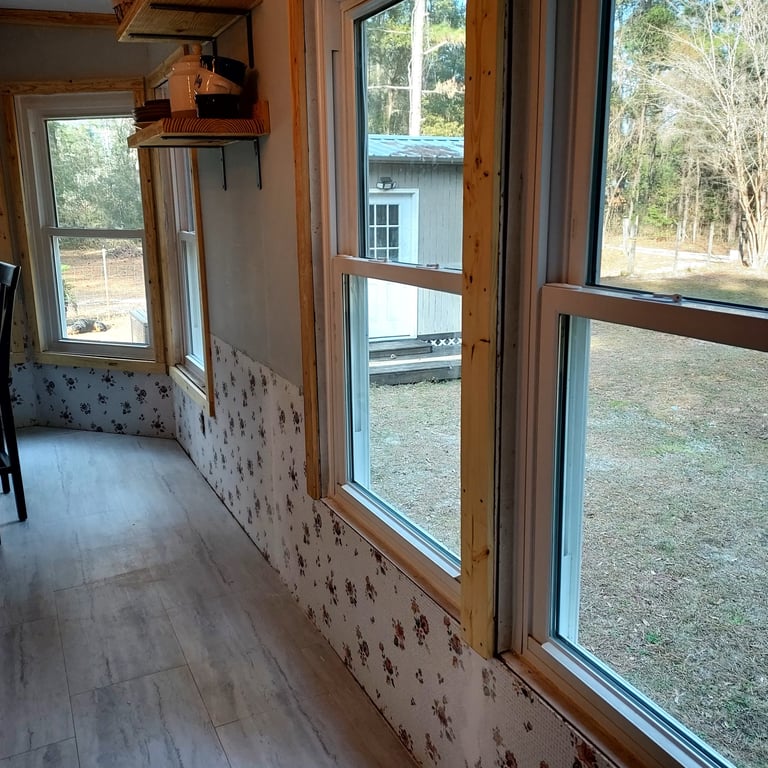
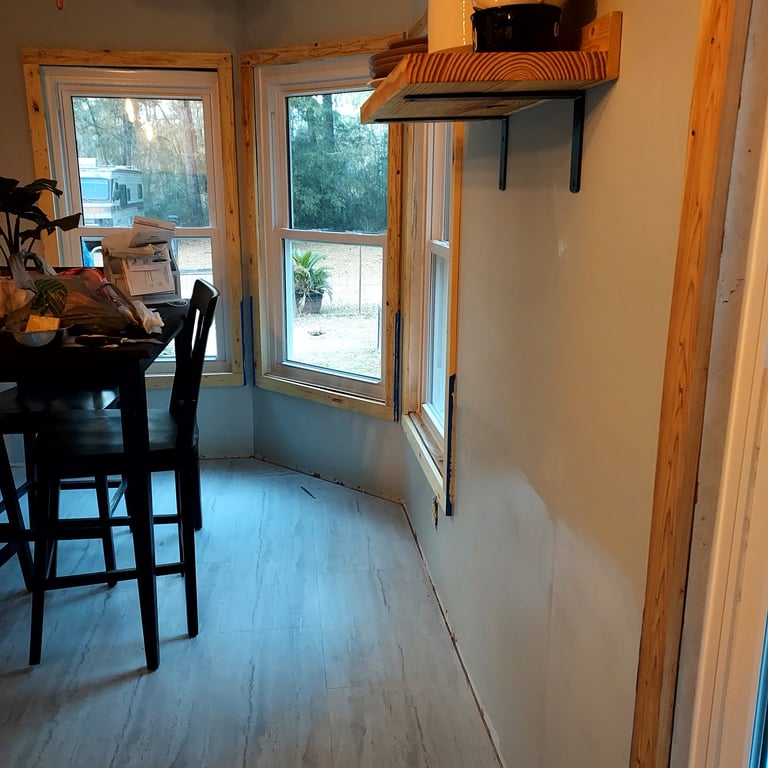
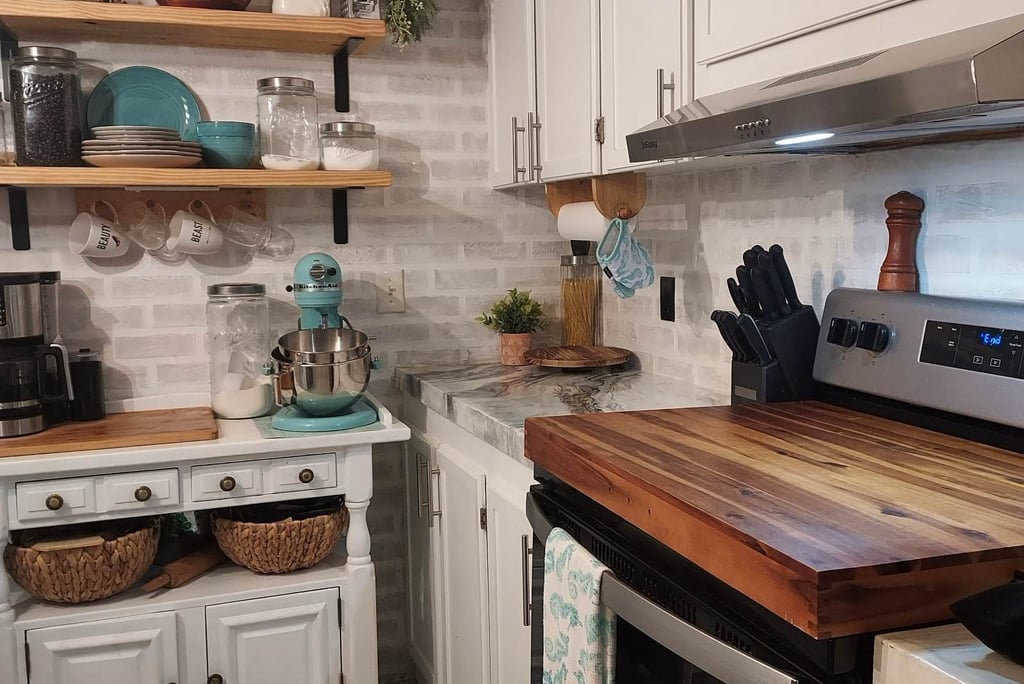
Natural Trim: Bringing the Outdoors In
With the walls and cabinets done, we took a hard look at how we wanted to do trim. My husband loves greenery indoors, but I’m no plant keeper (faux greenery is more my speed—check out my post on that!). Instead, we opted to bring the outdoors in with a natural aesthetic by using natural trim instead of white. We knew that too much white, especially with the cabinets, might make the kitchen look like a hospital, and we were going for a warmer trend. So, natural trim it was! We used 1x3 and 1x4 furring strips (you can read more about our love for furring strips in a recent post), sanded them smooth, and left them natural to highlight the wood’s grain and knots. We installed them around the windows, as baseboards, and even around the new sink base surround. The natural wood added an organic warmth that perfectly complemented the #SeaSalt walls, setting the tone for our #farmhousecoastal vibe.
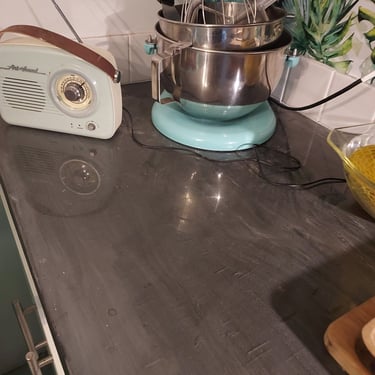
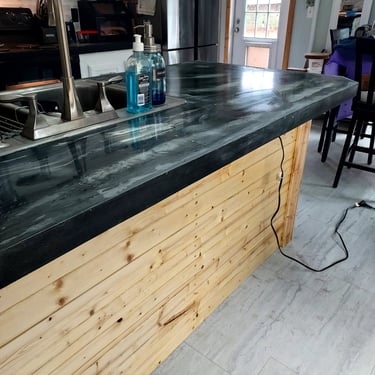
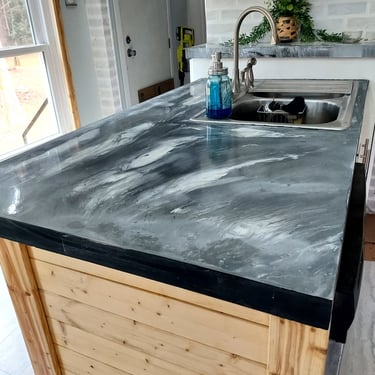
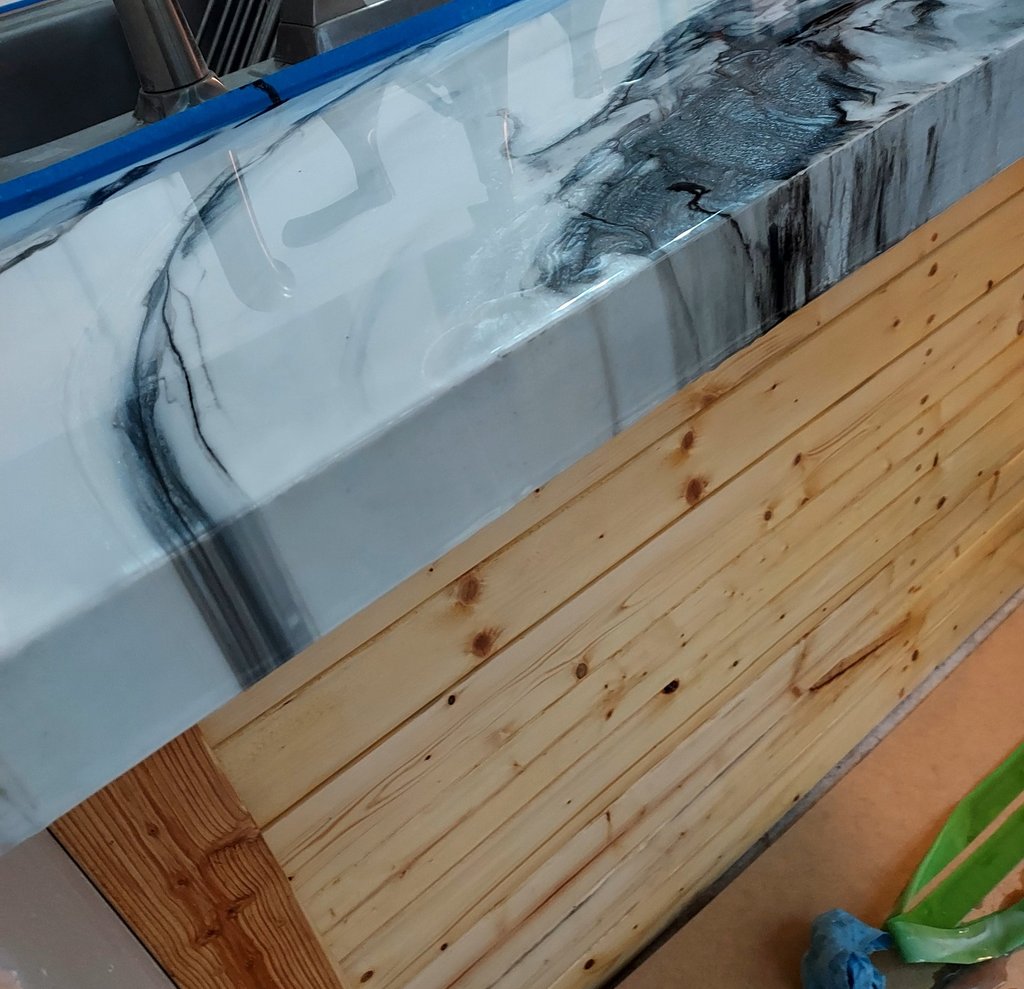
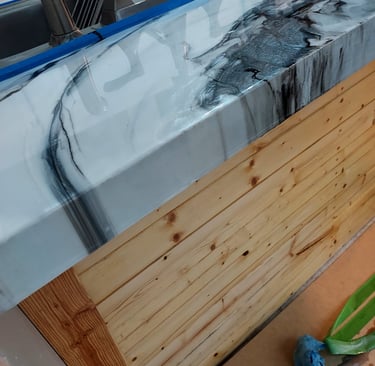
Epoxy Countertops: A Redo with Lessons Learned
The countertops were another challenge. During the Grenada Green phase, we had done a coat of epoxy that was black with hints of gray. They were… okay, but because this is a mobile home, the countertops were often uneven, and that first run of epoxy proved to be a total mess! So, we decided to go another way—white with black inlays. The challenges in this process definitely warrant a blog post all its own (stay tuned!), but I’ll give you the short version.
We sanded down the old epoxy, applied a primer, and poured a new layer of white epoxy, using a heat gun to create black inlays for a marbled effect. This time, we made sure to capture the process, and I’m excited to say we got a lot of photos of the second epoxy process—I have them ready to share in that upcoming post! We also have plenty of photos and information from the first run, which will be invaluable if you’re thinking about changing your countertops with epoxy. We love our new countertops—they have no issues with heat, and they give a high-end look without the weight or cost of stone, which is perfect for a mobile home. It’s a messy job, but totally worth it!
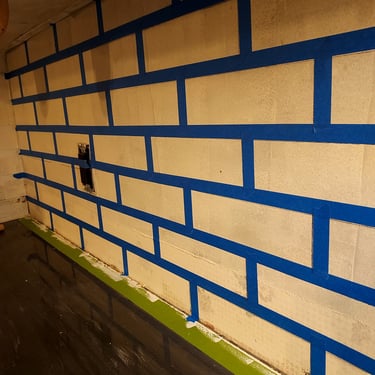
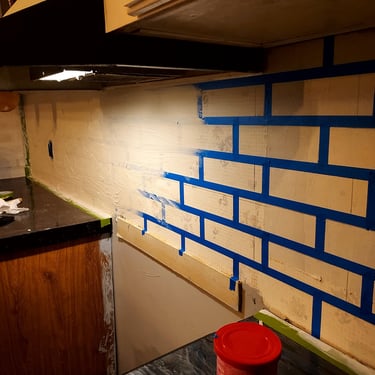
Faux Brick Accent Wall: A Farmhouse Touch
We also added a faux brick accent wall, which doubled as a wipeable backsplash. This was done with painter’s tape, wall mud, and various kinds of paint, and let me tell you—it was a project! This one deserves its own blog post with step-by-step instructions (you won’t want to miss it!), but for now, I’ll say it gives just a hint of an authentic farmhouse, almost Italian feel to the kitchen. We taped off a brick pattern, spread the mud, and painted it white with gray distressing for a weathered look. I won’t tell you it was fun (it was a lot of work!), but I will tell you it was worth it. The texture and charm it adds are unbeatable, and it’s practical too—spills wipe right off!
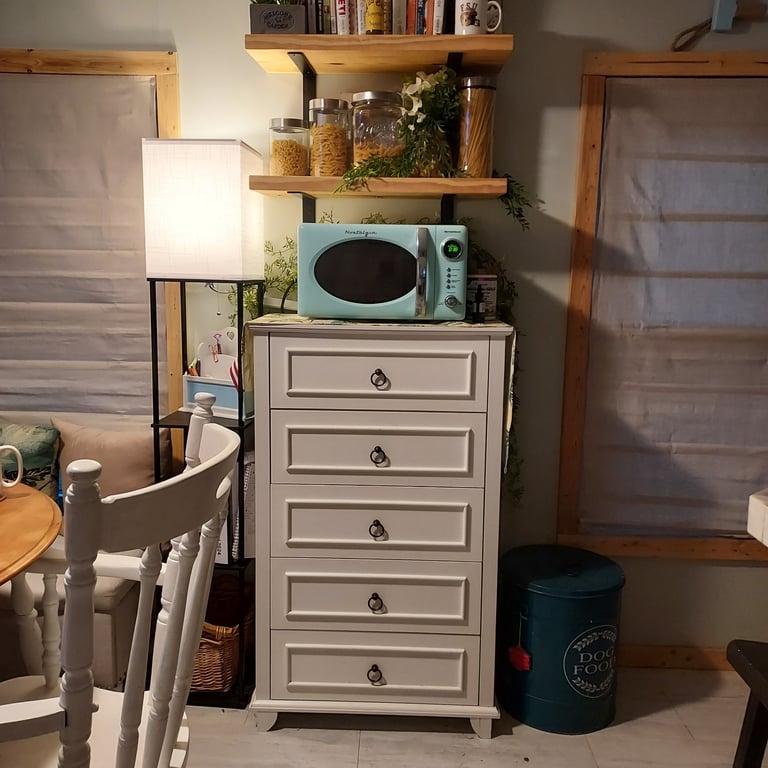
Finishing Touches: Shelves, Storage, and Unique Furniture
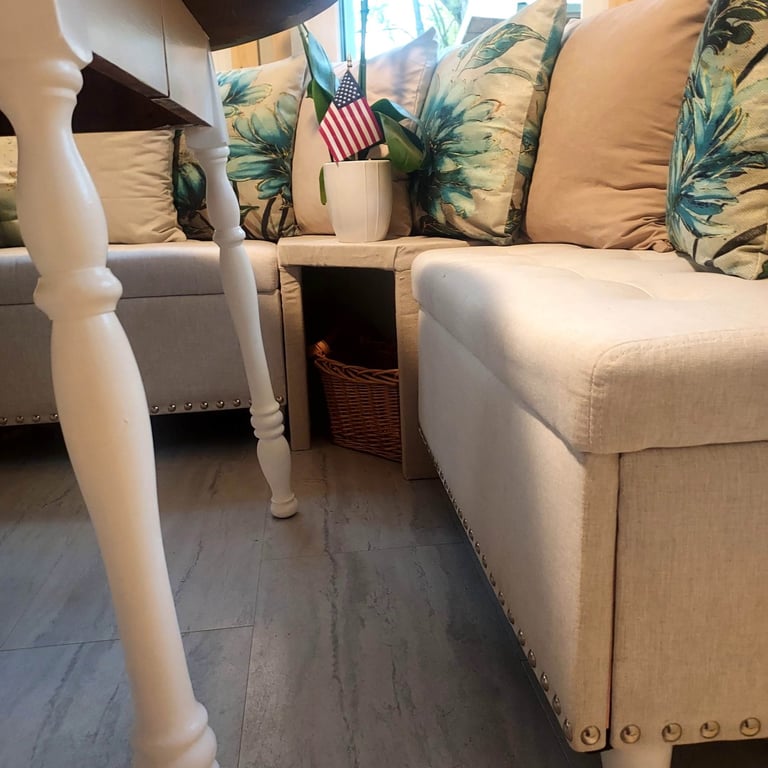
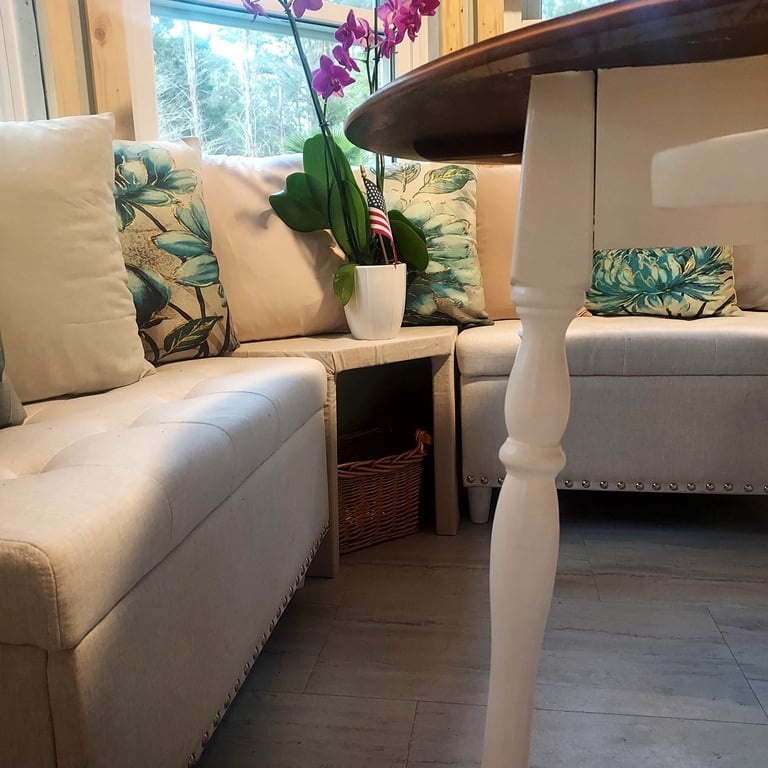
Then we came around to the finishing touches, and this is where the kitchen really started to feel like ours. We installed floating shelves made from 2x12s, poly’d and left natural, to match the trim. Above the dead space in the bar area, we added a cabinet for extra storage—perfect for hiding less-used items. We also made some unique furniture choices to piece it all together. Near the back door, we added a hall tree as a landing pad, which blends seamlessly into storage benches in the breakfast nook.
We had originally placed a painted armoire in that spot during the Grenada Green to white cabinets stage, but it was so bulky that we swapped it out for the hall tree—a much better fit! The breakfast nook features my great-grandmother’s 1940s table, which we refinished with a light sanding and a fresh coat of poly to bring out its vintage charm. We recently added a neat floor lamp to the nook for low light in the morning—I love sipping my coffee there while writing these blog posts, and the soft glow keeps things quiet and cozy.
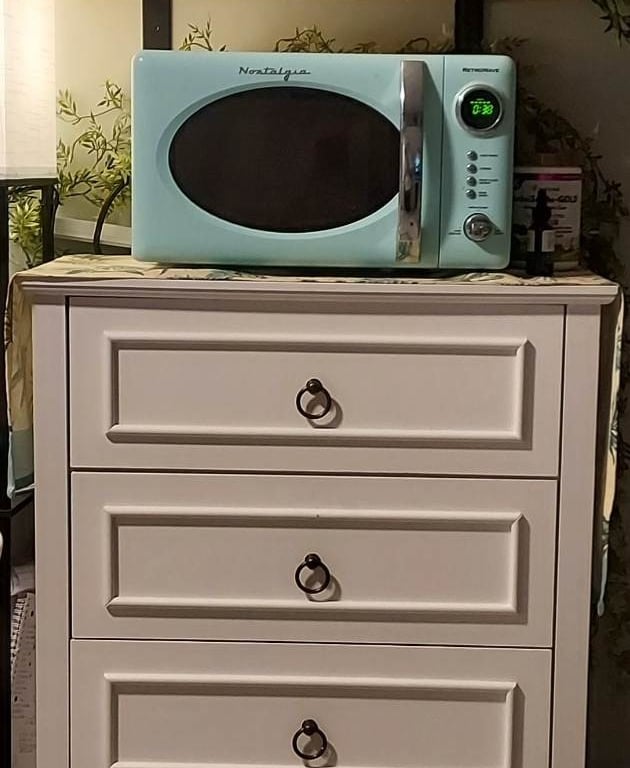
And here’s a fun one: we added a dresser in the kitchen! Who knew that was a thing? It’s not vintage, but it looks vintage—we purchased it in white to match the cabinets and placed it under the floating shelves to store cookbooks, pasta in decorative canisters, and house the microwave. It looks almost like a built-in and adds a quirky, personal touch to the space.
Pops of Color and New Appliances: The Final Flourish
Lastly, we added pops of color with appliances and installed new ones—because after all this hard work, we deserved it! The oven was original to the home and had been painted black back in Phase 1 with the gray walls and black cabinets. At some point along the way (I don’t quite remember when!), I saw a fridge and dishwasher on Craigslist and bought them. They worked for a while, but the fridge was huge and bulky—so deep that it stuck out like a sore thumb.
So, we carefully selected a refrigerator that fit the space better, along with a new stove and dishwasher, all in sleek stainless steel. These new appliances brought the kitchen into the modern age while keeping the farmhouse coastal vibe intact. We also chose a vibrant teal for our KitchenAid mixer, microwave, oven mitts, and towels, adding a playful yet coastal touch that everyone loves (check out my post on using accent colors for more on that!). Stay tuned as we break down these steps in future posts, because there’s so much more to share about making this kitchen one of the most loved rooms in our home!
What’s Next in the Series?
We’ve come a long way, but there’s still more to explore! In Part 4, we’ll dive deeper into the epoxy countertop redo, sharing all the lessons we learned from that first messy attempt, along with plenty of photos from the second process. We’ll also break down the step-by-step process for creating the faux brick accent wall and backsplash. Have a kitchen remodel tip or a favorite pop of color? Tag us on social media with your own Semperfidiy projects using #SemperfidiyDIY!
Until next time,
R.J. Baker
Semperfidiy.com