Kitchen Remodel Series, Part 4 of 5: Faux Brick Wall, Island Wrap, Epoxy Countertops, and Final Touches
How we created a faux brick wall, wrapped our island, redid the epoxy countertops, and added teal accents with faux greenery!
KITCHEN
RJ Baker
4/7/20257 min read

Welcome back to Semperfidiy.com for Part 4 of our Kitchen Remodel Series—now a five-part journey! If you’ve been following along, you’ve seen our double-wide kitchen evolve from a 2000s floral nightmare (Part 1), to the tropical chaos of Grenada Green (Part 2), to a serene transformation with Sea Salt walls, natural trim, and thoughtful furniture choices (Part 3). In Part 3, I promised we’d dive deeper into two major projects—the faux brick accent wall/backsplash and the epoxy countertop redo—along with more steps to bring our farmhouse coastal haven to life. Today, I’m sharing the details of those projects, plus how we wrapped our kitchen island with 1x4s and added some final touches. We’ll save the furniture refurbishment details for Part 5, where we’ll also share the full reveal—stay tuned! Let’s get into it!
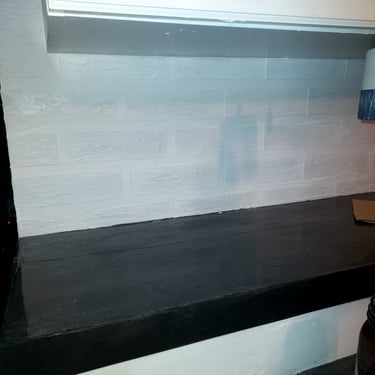
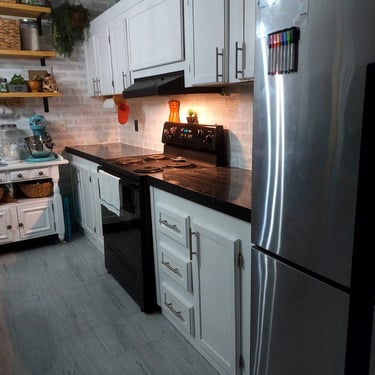
Faux Brick Accent Wall and Backsplash: A Step-by-Step Guide
First up, the faux brick accent wall and backsplash—a project that added so much texture and charm to our kitchen. We tackled this early in this phase, as it set the tone for the farmhouse feel we wanted. This wall gives a hint of an authentic farmhouse, almost Italian vibe, and doubles as a wipeable backsplash—perfect for a busy kitchen. Here’s how we did it, broken down into manageable steps:
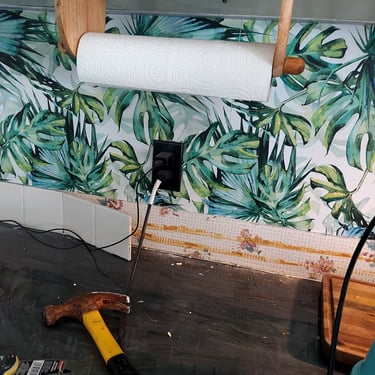
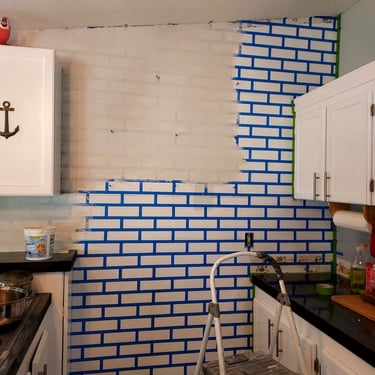
Remove the old backsplash: We started by removing the old green 4" tile backsplash (painted white in Phase 1) and the tropical palm leaf peel-and-stick from the Grenada Green phase. Surprisingly, the tiles fell off easily—we gently wedged a chisel between the tile and the wall, and they popped right off, revealing they had been attached with liquid nails that had long lost its adhesion. As the tiles came down, that loud floral wallpaper from the original kitchen came roaring back, reminding us of the chaos we started with!
Cover the floral wallpaper: We quickly covered up that floral nightmare with our new design to move forward with the faux brick look.
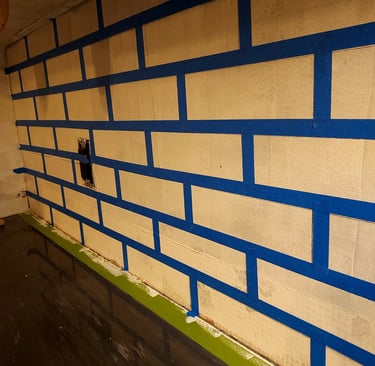
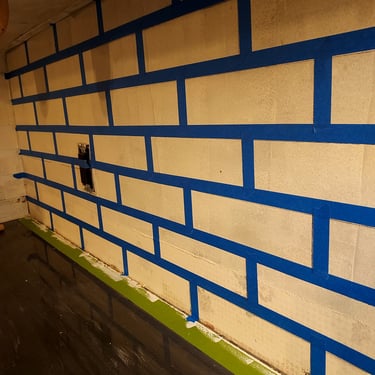
Tape the brick pattern: We used painter’s tape to create a brick pattern—each “brick” was about 2.5 inches tall and 8 inches long, with ½-inch gaps for “mortar” lines. This step took patience, as taping the pattern was tedious, but it’s key to getting the brick shapes right.
Apply joint compound: We applied joint compound (wall mud) with a trowel, spreading it about ¼-inch thick over the taped area, then carefully peeled off the tape to reveal the brick shapes.
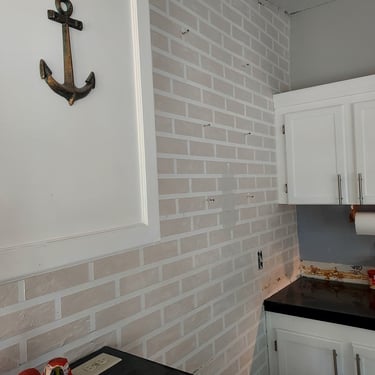
Let it dry and keep it choppy: After the compound dried overnight, we left the bricks choppy for an authentic look with brick-like imperfections—we didn’t sand them down, as we wanted those natural textures.
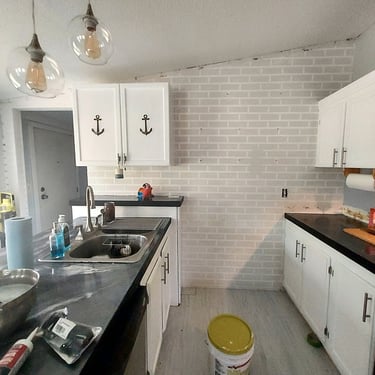
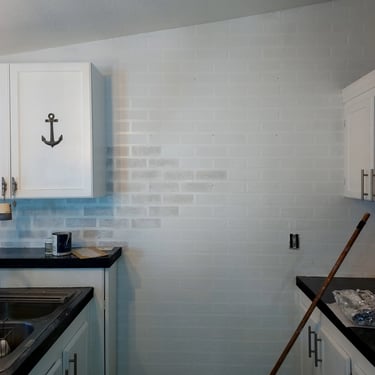
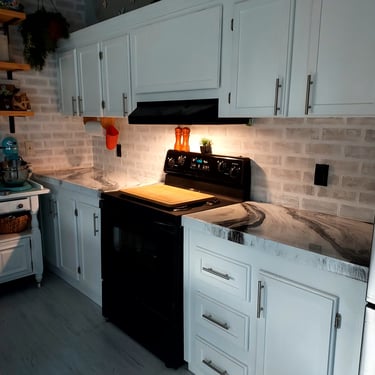
Dry brush the paint: We used a dry brush paint effect to enhance the texture, starting with an exterior semi-gloss white paint as the base. Then, we mixed some gray semi-gloss paint we already had and dry-brushed it over the white to create a weathered look. We skipped sealing with polyurethane since it can yellow over time, and the semi-gloss paint gave us the wipeable surface we needed.
This project cost less than $50, but the result is a textured focal point that ties the farmhouse coastal vibe together.


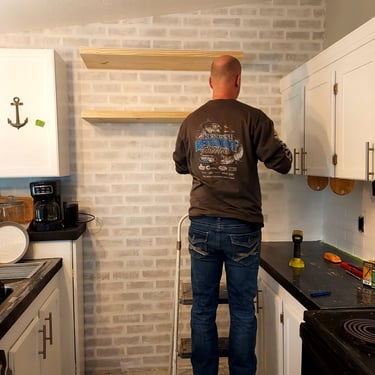
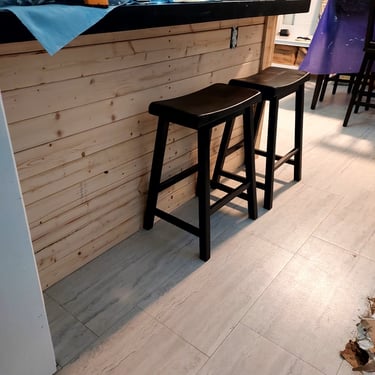
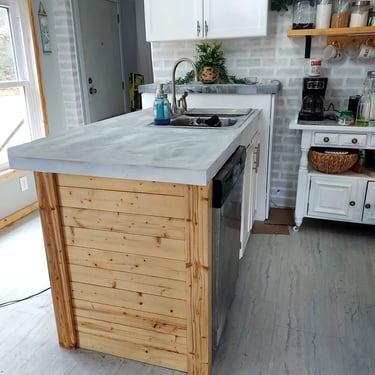
Wrapping the Kitchen Island: A Natural Wood Upgrade
With the faux brick wall setting the stage, we turned our attention to the kitchen island, which was in desperate need of a makeover. Here’s how we transformed it with a natural wood upgrade, step by step:
Remove the old paneling: The island had old painted paneling that had seen better days, so we started by removing it, revealing the island’s frame underneath.
Reinforce the island: The island was a bit wobbly, so the guy who puts the SemperFi in SemperFiDIY stepped in to reinforce it, adding stability with some extra bracing.
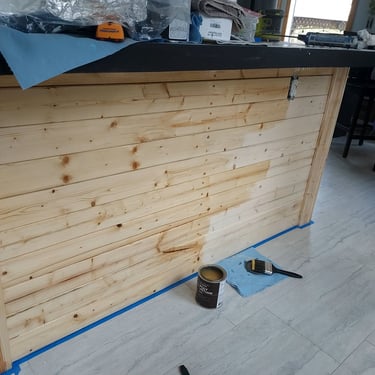
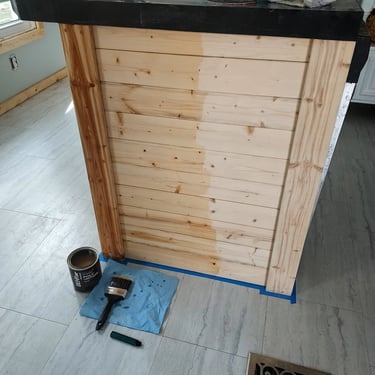
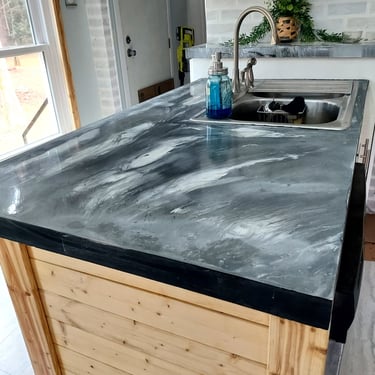
Wrap with 1x4s: We wrapped the island with 1x4 furring strips, measuring and cutting them to fit around the island’s base.
Screw the boards for stability: We screwed the boards into place, which not only gave the island a much-needed unique makeover but also helped build stability, making it sturdier than ever.
Sand and poly: We sanded the boards smooth and applied a clear polyurethane to protect the wood and bring out its natural grain, matching the natural wood trim and floating shelves.
The natural wood wrap ties the island into the farmhouse aesthetic, making it feel cohesive with the Sea Salt walls, white cabinets, and faux brick backsplash. It was a small project—costing about $30 in materials—but it made a big difference in the overall look, and it set the stage for the countertop redo that came next.


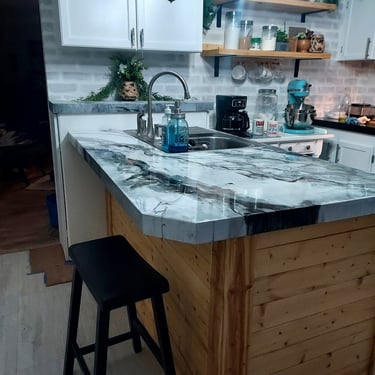
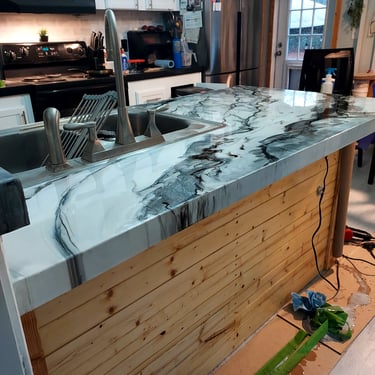
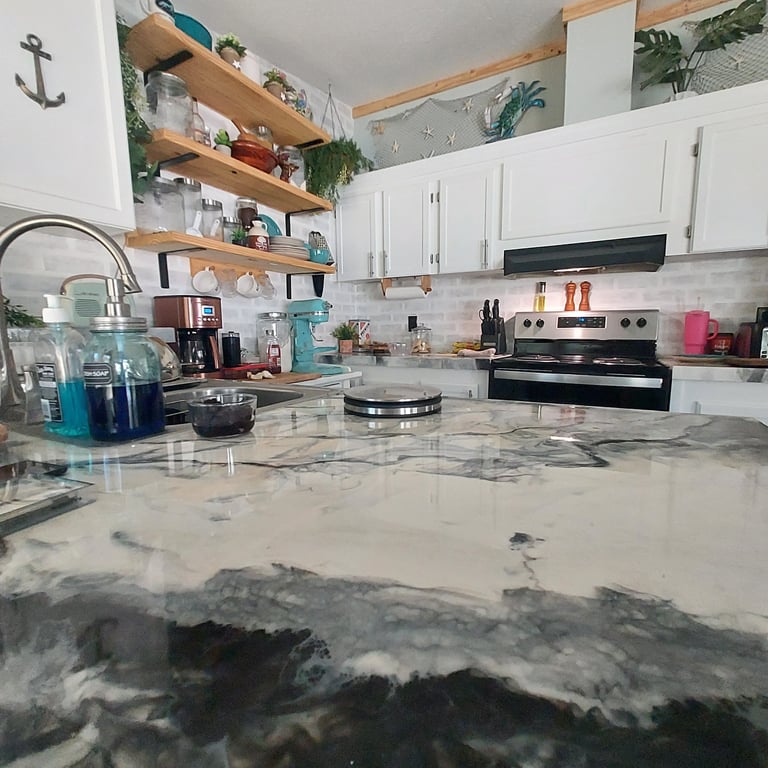
Epoxy Countertops: From Messy First Attempt to Stunning Redo
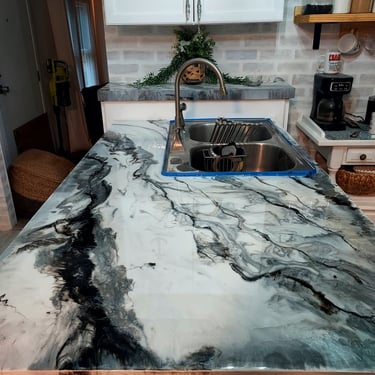
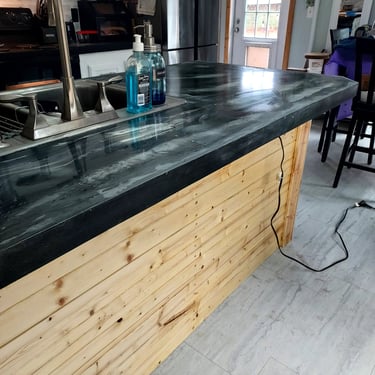
After wrapping the island, we moved on to the epoxy countertops—a journey all its own. Back in the Grenada Green phase, we tried our first epoxy coat—black with hints of gray. It was a mess, thanks to the uneven countertops in our mobile home. In Part 3, we redid them in white with black inlays, and I’m excited to share the process with plenty of photos from the second attempt! Here’s how we did it:
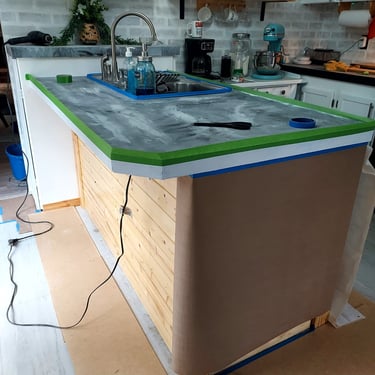
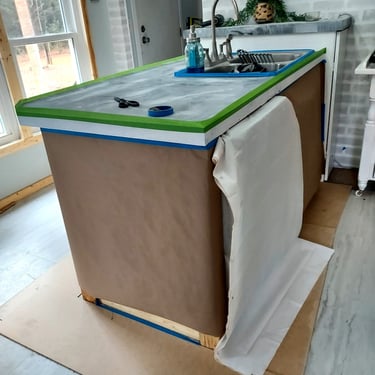
Prepare the space: Preparation is key with epoxy projects—your cure time is limited, so you need to be organized and have a plan! We put down cardboard on the floor and protected the cabinets with construction paper before starting, ensuring we wouldn’t make a mess.
Sand the old epoxy: We sanded the old black epoxy with 80-grit sandpaper to rough it up, then cleaned it thoroughly to remove dust.
Paint the edges: We didn’t use a primer since the new epoxy will meld with the old epoxy, but we did paint the edges white (they were black) to ensure a cohesive drip off the edges.
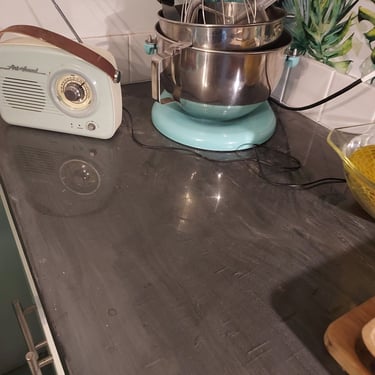
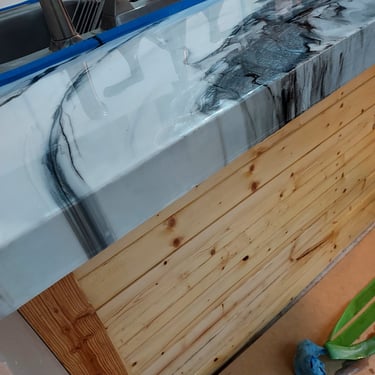
Mix and pour the epoxy: We mixed the epoxy resin (a kit from a local hardware store—about $100) and poured a white base layer.
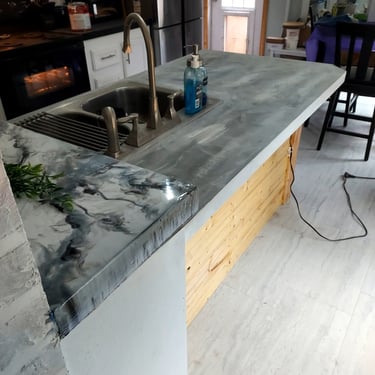
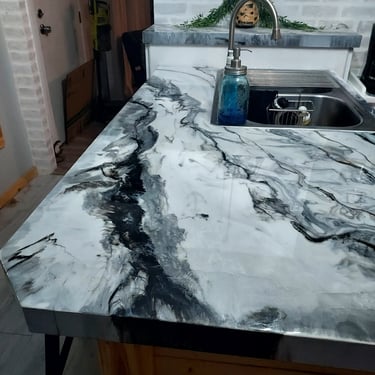
Add black inlays: While the white layer was still wet, we dripped black epoxy in small sections and used a heat gun to create marbled inlays, swirling the colors for a stone-like effect. The natural light from our five windows helped us see what we were doing, but we had to work fast—epoxy starts getting “gooey” after about an hour.
Remove tape and let it drip: After about an hour, when the epoxy started getting gooey, we removed the tape, letting the edges naturally spill over and drip onto the protected floor for a seamless look.
Let it cure: After 48 hours to fully cure, the result was a glossy, high-end look that’s heat-resistant and perfect for a mobile home—no heavy stone needed!
This project cost under $200, and while it was messy (wear gloves and cover everything!), it was worth it. Be on the lookout for all the items you need before you start—mix your colors quickly and execute your plan, because there’s not much time for errors with epoxy!

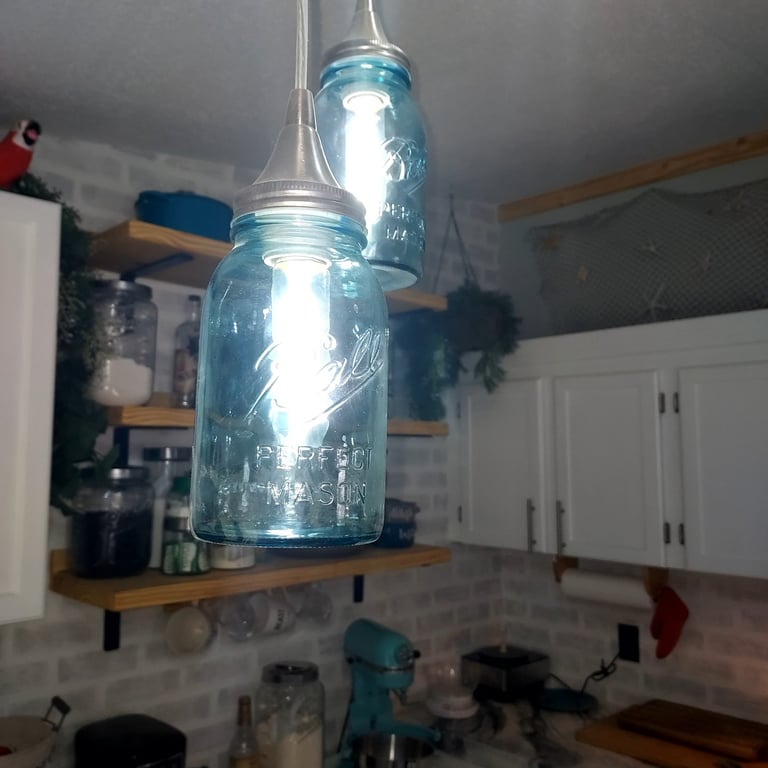
Final Touches: Teal Blue Mason Jar Chandelier, Decorative Accents, Coffee Bar, and Faux Greenery
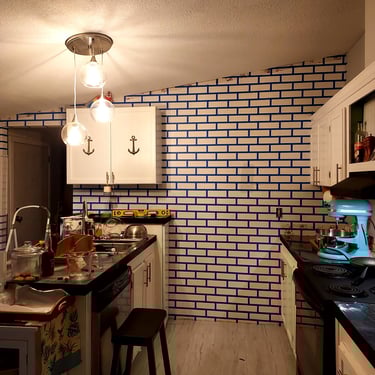
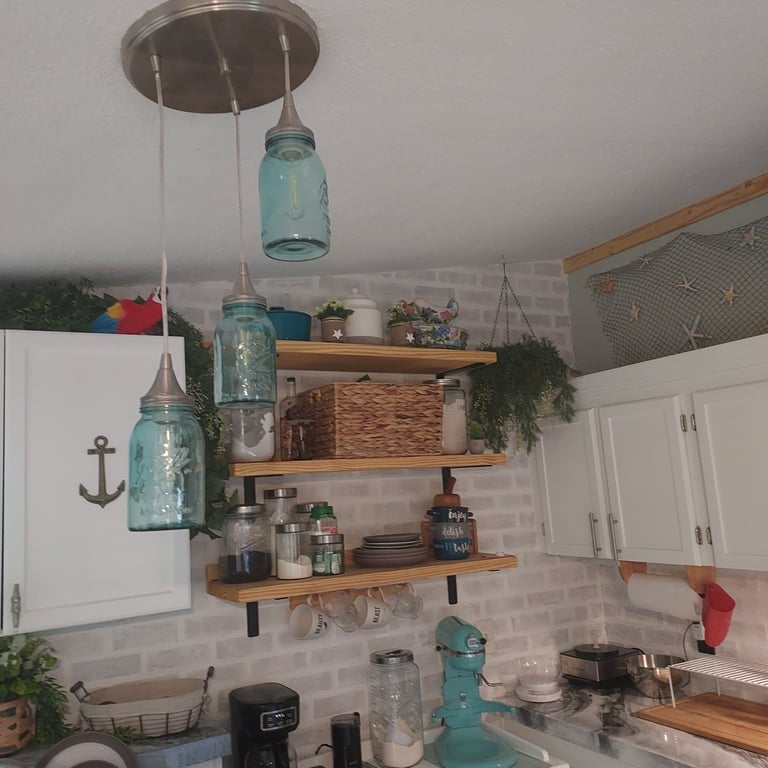
We wrapped up this phase with some final touches to bring the kitchen together. First, we created the teal blue mason jar chandelier with Edison bulbs to hang above the breakfast nook, as promised in Part 3. Here’s how we made this DIY light fixture, which became the primary light source for our kitchen:
Gather materials: We purchased teal mason jars on Amazon—six of them to create a statement piece. We reused an old pendant light fixture we had bought from Home Depot, which was designed to accept different globes, making the mason jars the perfect replacement globes.
Modify the mason jar lids: We punched holes in the mason jar lids to fit the pendant light components, then used rubber grommets purchased from our local hardware store to make a stopper, altering the lids so they would accept the screw and bolt from the pendant light.
Add the bulbs: We selected slim daylight Edison bulbs that fit down inside the jars, which we also sourced online. The daylight bulbs were important because the jars are teal, ensuring the light wouldn’t be too dim or distorted. These bulbs were the best shape and light wattage for our purpose since this chandelier is the primary kitchen light, though there are other bulb options you could explore.
Assemble the chandelier: We fitted the bulbs into the sockets through the modified lids, then attached the teal mason jars directly to the original pendant light fixture, using them as the new globes for a seamless, updated look.
The warm glow of the Edison bulbs makes the nook cozier, and the teal adds a pop of color that ties into our farmhouse coastal aesthetic.
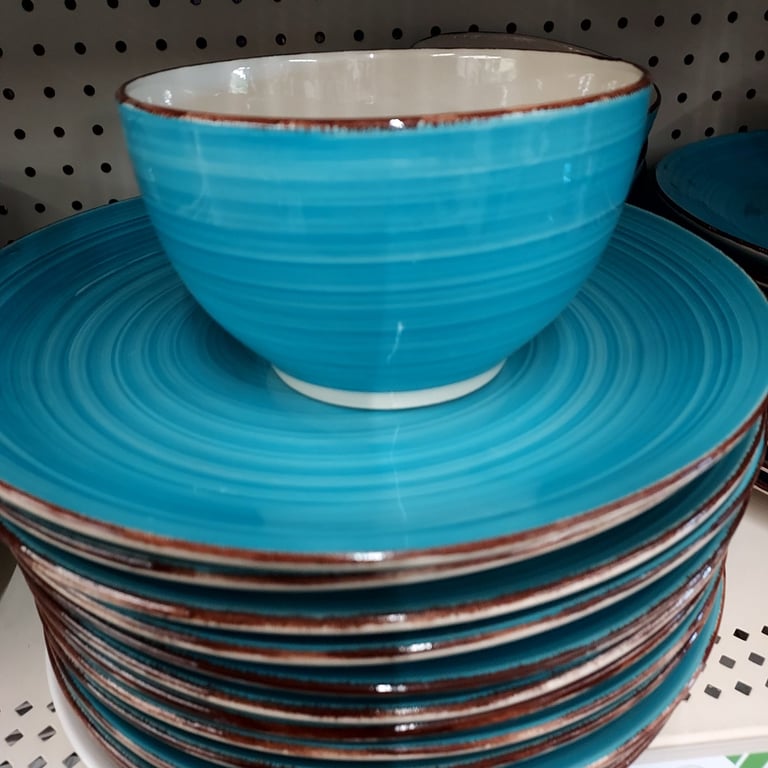
We also added decorative pieces to the floating shelves—not all teal, but a mix that reflects our style. We included mason jar canisters for my different baking flours and sugars, a cookbook collection that adds a personal touch, and some holiday dishes for a festive vibe. These elements make the shelves both functional and charming. Another smart addition was turning the kitchen cart into a coffee bar, which worked out beautifully and made “space” sense in our layout, giving us a dedicated spot for morning coffee that keeps the counters clear.
Finally, we incorporated faux greenery to bring the outdoors in, since I’m not great with real plants. We added plants up above the additional cabinet placed next to the sink, giving that area a fresh, green touch. We ran a faux vine behind the microwave under the natural shelves, adding a subtle organic element, and draped another vine up and over the bench at the door for a cohesive look. To fill a blank corner at the crest of the roof and cabinets, we added a hanging plant, which draws the eye up and makes the space feel more complete. These additions added texture and warmth, enhancing the farmhouse coastal aesthetic without any maintenance (see my post on faux greenery for more ideas!).
What’s Next in the Series?
We’re almost there, but there’s still more to share! In Part 5, we’ll wrap up the Kitchen Remodel Series with a full reveal of the completed space, including how we refurbished key furniture pieces like the dresser, my great-grandmother’s 1940s table, and the hall tree to add character. We’ll also take a final look at how all the elements—Sea Salt walls, white cabinets, natural wood, faux brick, epoxy countertops, and teal accents—come together, reflecting on the journey and sharing our favorite lessons learned. What’s your favorite kitchen remodel detail so far? Let me know in the comments below, or tag us on social media with your own Semperfidiy projects using #SemperfidiyDIY!
Until next time,
Semperfidiy.com